
AI for Child Nutrition is changing how we plan children’s diets. AI can analyze data, find patterns, and create custom nutrition plans. This helps parents and health experts ensure kids get the nutrients they need. With rising childhood malnutrition and obesity, AI is a powerful tool. Machine learning and AI-powered food chatbots are now used to promote healthy eating for children. Studies show AI can improve a child’s diet by offering personalized advice based on age, health needs, and culture.
(N.B: Get ready to explore these mouthwatering recipes—download our exciting eBook at the bottom of the page to dive in! )
How AI Improves Child Nutrition
AI helps meet children’s nutrition needs by analyzing growth and suggesting solutions. It can also predict health issues related to poor nutrition. By providing meal plans with essential vitamins and nutrients, AI encourages kids to eat more fruits, vegetables, and whole grains.
AI for Healthy Eating Habits
Using AI for child nutrition gives parents access to custom meal plans. These AI tools consider age, health conditions, and culture to create personalized plans. They also track eating habits and help manage portion sizes, supporting a healthy relationship with food.
AI in Public Health Nutrition
AI can revolutionize public health nutrition. It can analyze local food supplies and create meal plans based on available resources. Governments and organizations use AI to track food security and malnutrition rates, which helps them direct resources effectively.
Food Chatbots: Personalized Dietary Advice
One exciting AI tool for child nutrition is the food chatbot. These systems answer questions and give dietary advice based on a child’s needs. Chatbots consider health conditions, diet restrictions, and nutritional requirements, reducing stress for parents and helping them make better food choices.
Using AI to Fight Malnutrition
AI helps fight malnutrition, especially in low-income areas. It creates diets using local food, making them sustainable. AI systems can also detect early signs of malnutrition and suggest interventions in time. Governments and healthcare providers can use AI to improve public health.
Ethical Concerns with AI in Child Nutrition
There are ethical concerns with using AI in child nutrition. Privacy, transparency, and access to AI tools must be carefully managed. Also, AI can be misused to market unhealthy food to kids. However, AI can also block harmful food ads and promote healthier options.
AI and the Future of Child Nutrition
As AI technology advances, it will play a bigger role in child nutrition. Future AI tools might consider children’s emotions about food to create more complete nutrition plans. AI could also be used in schools to improve meal quality and nutrition.
AI-generated recipes focused on children’s nutrition
Here are 20 AI-generated recipes that balance nutrition, taste, and ease of preparation, particularly for a vegetarian child who needs iron and fiber:
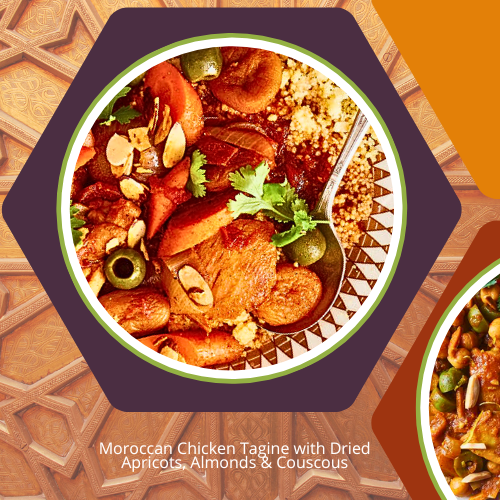
Moroccan Chicken Tagine with Dried Apricots, Almonds & Couscous
Ingredients:
- Chicken: 4 chicken thighs (bone-in, skin removed)
- Dried Apricots: 1/2 cup, chopped
- Almonds: 1/4 cup, toasted and sliced
- Couscous: 1 cup (whole wheat preferred)
- Vegetable Broth: 1 1/2 cups
- Onion: 1 large, thinly sliced
- Garlic: 3 cloves, minced
- Olive Oil: 2 tbsp
- Cinnamon: 1 tsp
- Ground Cumin: 1 tsp
- Ground Coriander: 1 tsp
- Ground Ginger: 1 tsp
- Turmeric: 1/2 tsp
- Saffron: A pinch (optional)
- Honey: 1 tbsp
- Lemon Zest: 1 tsp
- Fresh Parsley: 2 tbsp, chopped
- Salt and Pepper: To taste
Instructions:
- Prepare the Couscous:
- Heat the vegetable broth in a medium saucepan and bring to a boil.
- Stir in couscous, cover, and remove from heat. Let it sit for 5 minutes. Fluff with a fork before serving.
- Sauté the Aromatics:
- Heat olive oil in a large tagine or heavy-bottomed pot over medium heat.
- Add sliced onions and sauté until softened and lightly golden, about 5 minutes.
- Add minced garlic, cinnamon, cumin, coriander, ginger, turmeric, and saffron (if using). Stir to release the spices’ aroma for another 2 minutes.
- Cook the Chicken:
- Season the chicken thighs with salt and pepper and add them to the pot.
- Brown the chicken on both sides, about 5 minutes per side.
- Add the Dried Apricots:
- Stir in the chopped dried apricots and honey. Pour in enough water to almost cover the chicken.
- Bring the mixture to a simmer, cover, and cook on low heat for 35-40 minutes until the chicken is tender and cooked through.
- Toast the Almonds:
- While the tagine cooks, toast the sliced almonds in a dry skillet over medium heat until golden brown. Set aside.
- Finish and Garnish:
- Once the chicken is cooked, stir in the lemon zest and chopped parsley.
- Serve the chicken tagine over the couscous, garnishing with toasted almonds.
Nutritional Benefits:
- Chicken provides lean protein essential for growth.
- Apricots add fiber, vitamin A, and antioxidants.
- Almonds offer healthy fats, protein, and vitamin E.
- Couscous is a great source of complex carbs and fiber, especially if you opt for whole wheat couscous.
This Moroccan Chicken Tagine is a great way to introduce children to global flavors in a healthy and balanced meal.
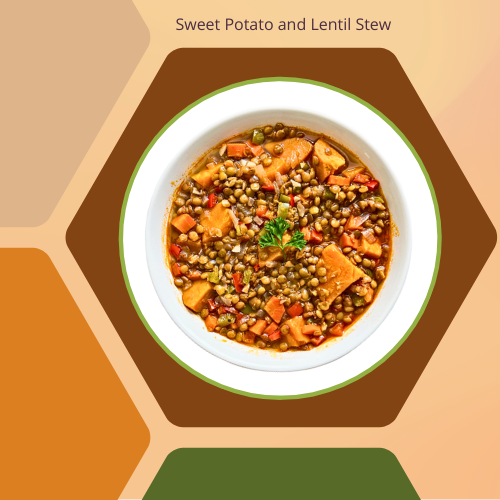
Sweet Potato and Lentil Stew
Ingredients:
- 1 large sweet potato, peeled and diced (rich in fiber and vitamin A)
- 1 cup red lentils (a good source of plant-based protein and iron)
- 1 small onion, finely chopped
- 2 cloves garlic, minced
- 1 carrot, diced
- 1 celery stalk, diced
- 1 can (14 oz) diced tomatoes (or 2 fresh tomatoes, chopped)
- 4 cups vegetable broth (low-sodium)
- 1 teaspoon ground cumin (for added flavor and iron absorption)
- 1/2 teaspoon turmeric (anti-inflammatory)
- 1/2 teaspoon paprika
- 1 tablespoon olive oil (for healthy fats)
- Salt and pepper to taste
- Fresh parsley or cilantro (optional, for garnish)
Instructions:
- Prepare the Vegetables: Heat olive oil in a large pot over medium heat. Add the chopped onion, garlic, carrot, and celery. Sauté for 5-7 minutes until the vegetables are soft and fragrant.
- Add the Sweet Potatoes and Spices: Stir in the diced sweet potatoes, cumin, turmeric, and paprika. Cook for another 3-4 minutes, allowing the spices to blend with the vegetables.
- Incorporate Lentils and Tomatoes: Rinse the red lentils under cold water. Add the lentils, diced tomatoes, and vegetable broth to the pot. Stir everything together.
- Cook the Stew: Bring the mixture to a boil, then reduce the heat to low. Cover the pot and simmer for about 25-30 minutes, or until the lentils and sweet potatoes are soft and fully cooked. Stir occasionally to prevent sticking.
- Season and Serve: Season the stew with salt and pepper to taste. If desired, garnish with fresh parsley or cilantro for added flavor. Serve warm.
Nutritional Highlights:
- Iron: Lentils are an excellent plant-based source of iron, and combining them with vitamin C from tomatoes helps increase iron absorption.
- Fiber: Sweet potatoes and lentils provide a great amount of fiber to support healthy digestion.
- Vitamins: This dish is rich in vitamin A (from sweet potatoes) and a variety of antioxidants (from the spices and vegetables).
Servings: 4
Cooking Time: 35-40 minutes
This recipe is easy to prepare and full of ingredients that are both nutritious and appealing to children. It offers a perfect balance of taste and essential nutrients, making it a great option for parents who want to ensure their kids get the necessary iron and fiber.
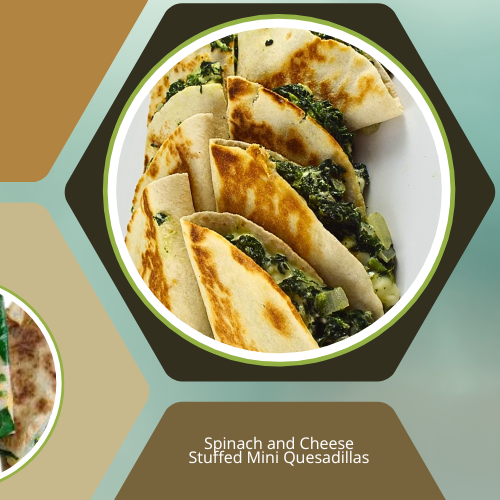
Spinach and Cheese Stuffed Mini Quesadillas
Ingredients:
- Tortillas: 4 small whole wheat tortillas (or corn tortillas)
- Spinach: 1 1/2 cups fresh spinach, chopped (or 1 cup frozen, thawed, and drained)
- Cheese: 1 cup shredded mozzarella, cheddar, or a mix of both
- Cream Cheese: 2 tbsp (optional, for added creaminess)
- Olive Oil: 1 tbsp (for brushing the tortillas)
- Garlic Powder: 1/2 tsp
- Cumin: 1/2 tsp (optional)
- Salt and Pepper: To taste
Instructions:
- Prepare the Filling:
- If using fresh spinach, sauté the chopped spinach in a pan over medium heat until wilted (2-3 minutes). If using frozen spinach, make sure it’s fully thawed and well-drained.
- In a bowl, mix the sautéed spinach with shredded cheese, cream cheese (if using), garlic powder, cumin (optional), and a pinch of salt and pepper. Stir until everything is well combined.
- Assemble the Mini Quesadillas:
- Lay the tortillas flat on a cutting board. Spread the spinach and cheese mixture evenly on half of each tortilla.
- Fold the tortillas in half to create half-moon-shaped quesadillas.
- Cook the Quesadillas:
- Heat a large skillet or griddle over medium heat. Lightly brush the outside of each folded tortilla with olive oil.
- Place the quesadillas in the skillet and cook for about 2-3 minutes on each side, or until the tortillas are golden brown and the cheese has melted.
- Serve:
- Cut each mini quesadilla into two or three wedges for easy serving.
- Serve with a side of salsa, guacamole, or sour cream for dipping.
Nutritional Benefits:
- Spinach provides vitamins A, C, and K, as well as iron and fiber, essential for growing kids.
- Cheese offers protein and calcium, crucial for bone development.
- Whole Wheat Tortillas add fiber, making this snack more filling and nutritious.
These Spinach and Cheese Stuffed Mini Quesadillas are perfect for a quick lunch, snack, or even a party appetizer. They’re kid-friendly, easy to prepare, and packed with flavor and nutrients!
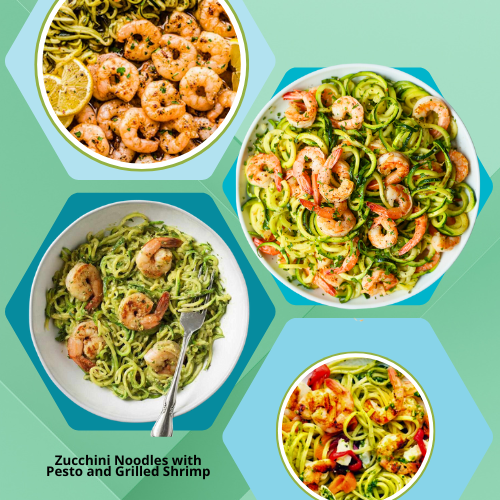
Zucchini Noodles with Pesto and Grilled Shrimp
Ingredients:
- Zucchini: 4 medium zucchinis, spiralized into noodles
- Shrimp: 1 lb large shrimp, peeled and deveined
- Olive Oil: 2 tbsp (divided for grilling and pesto)
- Garlic: 2 cloves, minced
- Lemon: 1, zest and juice
- Salt and Pepper: To taste
For the Pesto:
- Basil: 2 cups fresh basil leaves
- Pine Nuts: 1/4 cup (can substitute with walnuts or almonds)
- Parmesan Cheese: 1/3 cup grated
- Garlic: 1 clove
- Olive Oil: 1/4 cup
- Lemon Juice: 1 tbsp (for freshness)
- Salt and Pepper: To taste
Instructions:
- Prepare the Shrimp:
- Toss the shrimp with 1 tbsp of olive oil, minced garlic, lemon zest, salt, and pepper.
- Heat a grill pan or outdoor grill to medium-high heat.
- Grill the shrimp for 2-3 minutes per side, or until they are pink and cooked through. Set aside.
- Make the Pesto:
- In a food processor, combine the basil, pine nuts, Parmesan cheese, garlic, and lemon juice. Pulse until coarsely chopped.
- Slowly stream in the olive oil while processing until the pesto becomes smooth. Season with salt and pepper to taste.
- Set the pesto aside.
- Prepare the Zucchini Noodles:
- Spiralize the zucchinis to create long, thin noodles (zoodles). If you don’t have a spiralizer, you can use a vegetable peeler to make long, thin strips.
- Heat a large pan with the remaining 1 tbsp of olive oil over medium heat.
- Add the zucchini noodles and sauté for 2-3 minutes, just until they soften slightly. You don’t want to overcook them, as they can become watery.
- Assemble the Dish:
- Remove the zucchini noodles from the heat and toss them with a few tablespoons of pesto until well coated.
- Divide the zucchini noodles into serving bowls and top with the grilled shrimp.
- Serve:
- Garnish with additional Parmesan cheese, a sprinkle of pine nuts, or a squeeze of fresh lemon juice for extra brightness.
Nutritional Benefits:
- Zucchini is low in calories and rich in vitamins like A and C, as well as fiber for digestion.
- Shrimp is a great source of lean protein and provides omega-3 fatty acids, which are beneficial for heart and brain health.
- Pesto adds healthy fats from olive oil and pine nuts, while fresh basil offers antioxidants.
This Zucchini Noodles with Pesto and Grilled Shrimp recipe is a perfect combination of nutrition, taste, and ease of preparation. It’s a great way to introduce kids to healthy eating with familiar flavors and textures they’ll love!
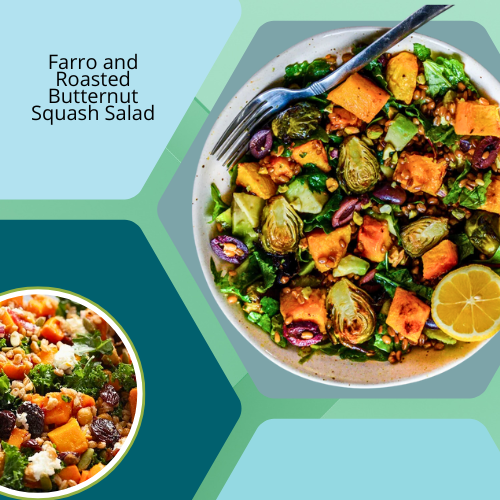
Farro and Roasted Butternut Squash Salad
Ingredients:
- Farro: 1 cup uncooked
- Butternut Squash: 1 small, peeled and cut into 1-inch cubes
- Olive Oil: 3 tbsp (divided)
- Salt and Pepper: To taste
- Baby Spinach: 2 cups, fresh
- Feta Cheese: 1/2 cup, crumbled
- Pomegranate Seeds: 1/4 cup (optional, for a burst of sweetness)
- Walnuts: 1/4 cup, toasted
For the Vinaigrette:
- Olive Oil: 1/4 cup
- Balsamic Vinegar: 2 tbsp
- Honey: 1 tsp
- Dijon Mustard: 1 tsp
- Salt and Pepper: To taste
Instructions:
- Cook the Farro:
- Rinse the farro under cold water and then cook according to package instructions (usually around 20-25 minutes in salted boiling water). Drain and set aside to cool.
- Roast the Butternut Squash:
- Preheat your oven to 400°F (200°C).
- Toss the butternut squash cubes with 1 tbsp of olive oil, salt, and pepper.
- Spread the squash in a single layer on a baking sheet and roast for 25-30 minutes, or until the squash is tender and golden brown. Let it cool slightly.
- Prepare the Vinaigrette:
- In a small bowl, whisk together the olive oil, balsamic vinegar, honey, Dijon mustard, salt, and pepper until smooth and well combined.
- Assemble the Salad:
- In a large bowl, combine the cooked farro, roasted butternut squash, baby spinach, crumbled feta cheese, toasted walnuts, and pomegranate seeds (if using).
- Drizzle the vinaigrette over the salad and toss gently to combine everything.
- Serve:
- Serve the salad at room temperature or slightly chilled for a refreshing and filling meal.
Nutritional Benefits:
- Farro is a whole grain packed with fiber, protein, and minerals like magnesium and zinc.
- Butternut Squash is a rich source of vitamins A and C, which are essential for immune function and healthy skin.
- Spinach provides iron and folate, which are crucial for healthy red blood cells.
- Feta Cheese adds calcium for strong bones, while walnuts provide omega-3 fatty acids for brain health.
This Farro and Roasted Butternut Squash Salad is a delightful blend of textures and flavors, perfect for a nutritious and satisfying meal that both kids and adults will enjoy!
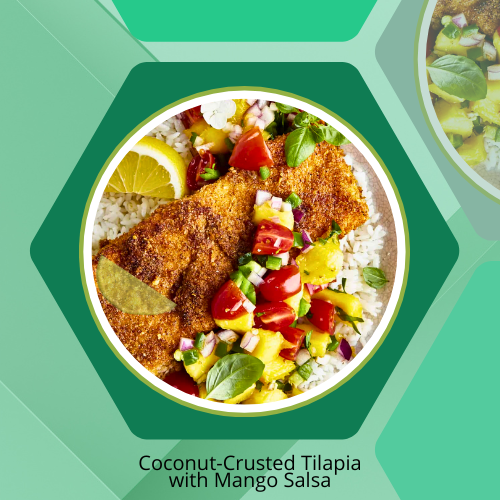
Coconut-Crusted Tilapia with Mango Salsa
Ingredients:
For the Tilapia:
- Tilapia Fillets: 4 (about 6 ounces each)
- Unsweetened Shredded Coconut: 1 cup
- Panko Breadcrumbs: 1/2 cup
- All-Purpose Flour: 1/4 cup
- Egg: 1, beaten
- Salt: 1/2 teaspoon
- Pepper: 1/2 teaspoon
- Olive Oil: 2 tablespoons (for cooking)
For the Mango Salsa:
- Mango: 1 ripe, diced
- Red Bell Pepper: 1/2, diced
- Red Onion: 1/4 cup, finely chopped
- Fresh Cilantro: 1/4 cup, chopped
- Lime Juice: 1 tablespoon
- Salt: To taste
Instructions:
- Prepare the Mango Salsa:
- In a medium bowl, combine the diced mango, red bell pepper, red onion, cilantro, lime juice, and salt. Mix well and set aside to allow the flavors to meld.
- Prepare the Tilapia:
- Preheat your oven to 425°F (220°C) or heat a large skillet over medium heat.
- Set up a breading station:
- In one bowl, place the flour seasoned with salt and pepper.
- In another bowl, place the beaten egg.
- In a third bowl, combine the shredded coconut and panko breadcrumbs.
- Coat the Tilapia:
- Dredge each tilapia fillet in the flour, shaking off the excess.
- Dip the fillet in the beaten egg, allowing excess to drip off.
- Press the fillet into the coconut and panko mixture, ensuring it is fully coated. Repeat with all fillets.
- Cook the Tilapia:
- If baking: Place the coated fillets on a greased baking sheet and drizzle with olive oil. Bake for 15-20 minutes, or until the fish flakes easily with a fork and the coating is golden brown.
- If frying: Heat olive oil in the skillet over medium heat. Cook the fillets for 3-4 minutes on each side, or until golden brown and cooked through.
- Serve:
- Plate the coconut-crusted tilapia and top each fillet with a generous scoop of mango salsa. Serve with rice or a side salad for a complete meal.
Nutritional Benefits:
- Tilapia is a great source of lean protein, which is essential for growth and development.
- Coconut adds healthy fats and fiber, contributing to satiety.
- Mango is rich in vitamins A and C, boosting immune health and promoting healthy skin.
- Bell Peppers provide additional vitamins and antioxidants, enhancing overall nutrition.
This Coconut-Crusted Tilapia with Mango Salsa is not only visually appealing but also a fun and tasty way to introduce kids to new flavors and healthy eating habits!
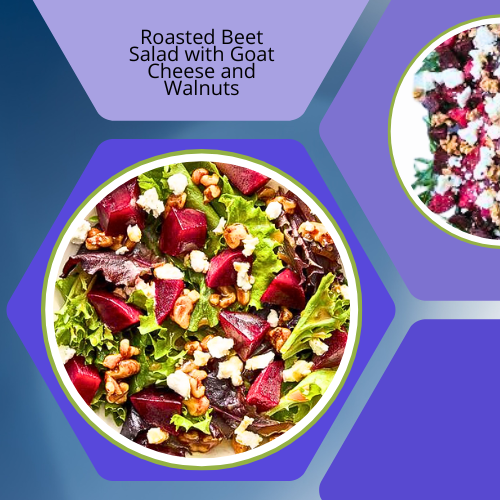
Roasted Beet Salad with Goat Cheese and Walnuts
Ingredients:
- Fresh Beets: 4 medium-sized, scrubbed and trimmed
- Olive Oil: 2 tablespoons
- Salt: 1/2 teaspoon
- Pepper: 1/4 teaspoon
- Mixed Greens: 4 cups (arugula, spinach, or your choice)
- Goat Cheese: 4 ounces, crumbled
- Walnuts: 1/2 cup, toasted
- Balsamic Vinegar: 2 tablespoons
- Honey: 1 tablespoon (optional)
Instructions:
- Roast the Beets:
- Preheat your oven to 400°F (200°C).
- Wrap each beet individually in aluminum foil. Drizzle with olive oil, sprinkle with salt and pepper, and seal the foil tightly.
- Place the wrapped beets on a baking sheet and roast for about 45-60 minutes, or until tender when pierced with a fork.
- Once cooked, allow them to cool slightly, then peel the skins off (they should slip off easily). Slice the beets into wedges or rounds.
- Toast the Walnuts:
- In a small skillet over medium heat, toast the walnuts for about 5 minutes, stirring frequently, until fragrant and lightly browned. Remove from heat and let them cool.
- Assemble the Salad:
- In a large bowl, combine the mixed greens and roasted beet slices. Gently toss to mix.
- Sprinkle the crumbled goat cheese and toasted walnuts over the top.
- Dress the Salad:
- In a small bowl, whisk together the balsamic vinegar and honey (if using). Drizzle the dressing over the salad just before serving.
- Gently toss the salad to combine and ensure everything is well-coated.
- Serve:
- Serve the salad immediately as a side dish or light main course. It pairs wonderfully with grilled chicken or fish for a more substantial meal.
Nutritional Benefits:
- Beets are packed with essential nutrients, including folate, fiber, and antioxidants, which support heart health and improve digestion.
- Goat cheese provides protein and calcium, essential for growing bodies.
- Walnuts are rich in healthy fats and omega-3 fatty acids, promoting brain health and reducing inflammation.
- Mixed greens add vitamins A, C, and K, contributing to overall well-being.
This Roasted Beet Salad with Goat Cheese and Walnuts is not only vibrant and appealing to children but also provides a wonderful balance of flavors and textures. It’s a delicious way to encourage kids to eat more vegetables and explore new tastes!
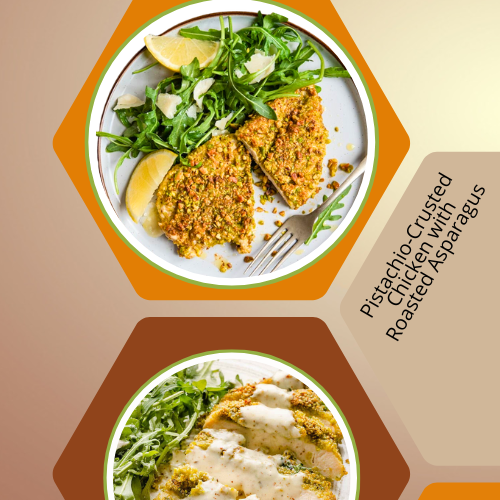
Pistachio-Crusted Chicken with Roasted Asparagus
Ingredients:
- Chicken Breasts: 4 boneless, skinless
- Pistachios: 1 cup, shelled and finely chopped
- Panko Breadcrumbs: 1/2 cup
- Parmesan Cheese: 1/4 cup, grated
- Olive Oil: 3 tablespoons, divided
- Dijon Mustard: 2 tablespoons
- Honey: 1 tablespoon
- Salt: 1/2 teaspoon, plus more to taste
- Pepper: 1/4 teaspoon, plus more to taste
- Asparagus: 1 bunch, trimmed
- Lemon Zest: 1 teaspoon
- Lemon Juice: 1 tablespoon
Instructions:
- Preheat the Oven:
- Preheat your oven to 400°F (200°C). Line a baking sheet with parchment paper.
- Prepare the Pistachio Crust:
- In a medium bowl, combine the finely chopped pistachios, panko breadcrumbs, and grated Parmesan cheese. Mix well and season with salt and pepper.
- Coat the Chicken:
- In a small bowl, whisk together the Dijon mustard, honey, and 1 tablespoon of olive oil. Brush this mixture over both sides of the chicken breasts.
- Press the chicken into the pistachio mixture, ensuring each breast is evenly coated with the crust.
- Roast the Chicken:
- Place the pistachio-crusted chicken breasts on the prepared baking sheet.
- Roast in the preheated oven for 20-25 minutes, or until the chicken is golden brown and cooked through (internal temperature should reach 165°F or 74°C).
- Prepare the Asparagus:
- While the chicken is roasting, toss the asparagus with the remaining 2 tablespoons of olive oil, lemon zest, salt, and pepper.
- Spread the asparagus on another baking sheet or next to the chicken on the same tray, if there’s space.
- Roast the Asparagus:
- Roast the asparagus for about 12-15 minutes, or until tender and slightly crisp. Once done, drizzle with lemon juice before serving.
- Serve:
- Serve the Pistachio-Crusted Chicken alongside the roasted asparagus. Garnish with extra lemon wedges for added freshness.
Nutritional Benefits:
- Pistachios are a good source of protein, fiber, and healthy fats, which support heart and brain health.
- Chicken provides lean protein necessary for muscle growth and repair, especially for growing children.
- Asparagus is rich in vitamins A, C, E, and K, along with antioxidants that promote healthy digestion and boost the immune system.
This Pistachio-Crusted Chicken with Roasted Asparagus dish balances crunch, flavor, and nutrition in a way that appeals to both kids and adults. It’s an excellent way to introduce new flavors to children, offering a sophisticated twist on a classic meal.
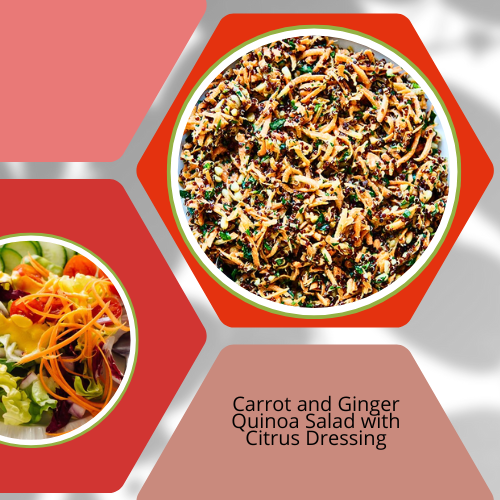
Carrot and Ginger Quinoa Salad with Citrus Dressing
Ingredients:
- Quinoa: 1 cup, rinsed
- Carrots: 2 large, peeled and shredded
- Fresh Ginger: 1 tablespoon, finely grated
- Green Onions: 2, finely sliced
- Fresh Cilantro: 1/4 cup, chopped
- Almonds or Cashews: 1/4 cup, chopped and toasted (optional)
- Dried Cranberries: 1/4 cup (optional for added sweetness)
For the Citrus Dressing:
- Fresh Orange Juice: 1/4 cup
- Fresh Lemon Juice: 2 tablespoons
- Olive Oil: 3 tablespoons
- Honey: 1 tablespoon (optional for added sweetness)
- Ground Cumin: 1/4 teaspoon
- Salt: 1/2 teaspoon, or to taste
- Pepper: 1/4 teaspoon, or to taste
Instructions:
- Cook the Quinoa:
- In a medium saucepan, combine the rinsed quinoa with 2 cups of water and a pinch of salt. Bring to a boil, then reduce the heat to low, cover, and simmer for 15-20 minutes, or until the quinoa is cooked and the water is absorbed.
- Remove from heat, fluff the quinoa with a fork, and let it cool to room temperature.
- Prepare the Salad:
- In a large bowl, combine the cooled quinoa with the shredded carrots, grated ginger, green onions, cilantro, and nuts (if using). Add dried cranberries for a touch of sweetness, if desired.
- Make the Citrus Dressing:
- In a small bowl, whisk together the orange juice, lemon juice, olive oil, honey (if using), ground cumin, salt, and pepper until well combined.
- Dress the Salad:
- Pour the citrus dressing over the quinoa mixture and toss everything together to ensure the flavors are well distributed. Adjust seasoning with additional salt or pepper, if needed.
- Chill and Serve:
- Refrigerate the salad for at least 30 minutes to allow the flavors to meld. Serve chilled or at room temperature.
Nutritional Benefits:
- Quinoa is a complete protein, providing all nine essential amino acids, making it an excellent choice for growing children.
- Carrots are rich in beta-carotene, which supports eye health and boosts the immune system.
- Ginger aids digestion and has anti-inflammatory properties.
- The citrus dressing adds vitamin C, which promotes healthy skin and immune function.
This Carrot and Ginger Quinoa Salad with Citrus Dressing is a light yet satisfying meal that introduces kids to a variety of textures and flavors while packing a nutritional punch. It’s perfect for lunchboxes or as a side dish for family meals!
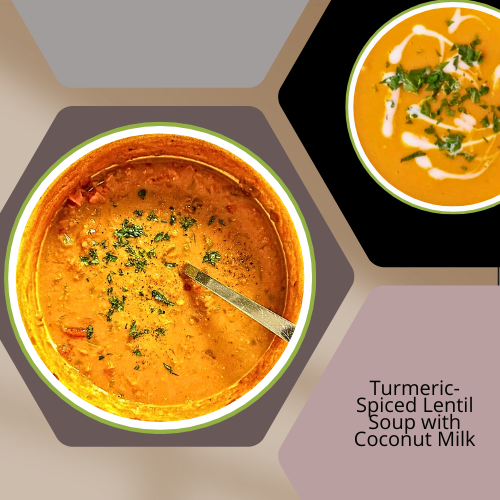
Turmeric-Spiced Lentil Soup with Coconut Milk
Ingredients:
- Red Lentils: 1 cup, rinsed
- Coconut Milk: 1 can (13.5 oz)
- Vegetable Broth: 4 cups
- Onion: 1 small, finely chopped
- Garlic: 3 cloves, minced
- Fresh Ginger: 1 tablespoon, grated
- Turmeric: 1 teaspoon
- Ground Cumin: 1 teaspoon
- Ground Coriander: 1 teaspoon
- Carrots: 2 medium, diced
- Tomato Paste: 1 tablespoon
- Lemon Juice: 1 tablespoon
- Fresh Cilantro: For garnish
- Olive Oil: 2 tablespoons
- Salt and Pepper: To taste
Instructions:
- Sauté Aromatics:
- Heat olive oil in a large pot over medium heat. Add chopped onions and sauté until soft and translucent, about 5 minutes.
- Stir in minced garlic and grated ginger, cooking for another 1-2 minutes until fragrant.
- Add Spices:
- Add the turmeric, cumin, and coriander to the onion mixture. Stir well and cook for another 1 minute to release the aromas of the spices.
- Incorporate Lentils and Carrots:
- Add the rinsed lentils, diced carrots, and tomato paste. Stir everything together to coat the lentils in the spices.
- Simmer the Soup:
- Pour in the vegetable broth and bring the mixture to a boil. Once boiling, reduce the heat and let the soup simmer for 20-25 minutes, or until the lentils are tender and the carrots are cooked through.
- Add Coconut Milk:
- Stir in the coconut milk and simmer for an additional 5 minutes, allowing the flavors to meld together. Taste and adjust the seasoning with salt and pepper.
- Finish with Lemon Juice:
- Stir in the lemon juice to brighten the flavors of the soup.
- Serve:
- Ladle the soup into bowls and garnish with fresh cilantro. Serve with crusty bread or naan for a complete meal.
Nutritional Benefits:
- Lentils are rich in plant-based protein and fiber, making this soup filling and nutritious for growing children.
- Turmeric has anti-inflammatory properties and aids in digestion.
- Coconut Milk adds healthy fats, which support brain development in children.
- Carrots and ginger bring immune-boosting vitamins and minerals to the dish.
This Turmeric-Spiced Lentil Soup with Coconut Milk is not only delicious and warming but also provides essential nutrients for children’s growth and development. It’s an ideal dish for a cozy family meal!
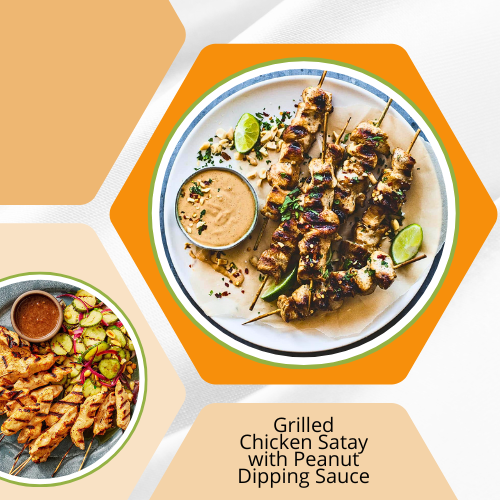
Grilled Chicken Satay with Peanut Dipping Sauce
Ingredients:
For the Chicken Satay:
- Chicken Breasts or Thighs: 1 lb, cut into thin strips
- Coconut Milk: 1/2 cup
- Soy Sauce: 2 tablespoons
- Lime Juice: 1 tablespoon
- Garlic: 3 cloves, minced
- Ground Coriander: 1 teaspoon
- Ground Cumin: 1 teaspoon
- Turmeric: 1/2 teaspoon
- Brown Sugar: 1 tablespoon
- Skewers: Soaked in water for 30 minutes if wooden
For the Peanut Dipping Sauce:
- Peanut Butter: 1/2 cup (smooth or chunky)
- Soy Sauce: 2 tablespoons
- Lime Juice: 1 tablespoon
- Honey: 1 tablespoon
- Coconut Milk: 1/4 cup
- Garlic: 1 clove, minced
- Sriracha or Chili Paste: 1 teaspoon (optional, for heat)
- Water: To thin the sauce as needed
Instructions:
- Marinate the Chicken:
- In a bowl, whisk together the coconut milk, soy sauce, lime juice, garlic, coriander, cumin, turmeric, and brown sugar.
- Add the chicken strips to the marinade, ensuring they are well-coated. Cover and refrigerate for at least 30 minutes (or up to 2 hours for deeper flavor).
- Prepare the Peanut Dipping Sauce:
- In a small bowl, mix together the peanut butter, soy sauce, lime juice, honey, coconut milk, garlic, and Sriracha (if using). Stir until smooth.
- If the sauce is too thick, add water a tablespoon at a time until it reaches your desired consistency.
- Set the sauce aside for serving.
- Grill the Chicken:
- Preheat the grill to medium-high heat.
- Thread the marinated chicken strips onto the soaked skewers.
- Grill the chicken skewers for 4-5 minutes per side, or until the chicken is fully cooked and has nice grill marks. Be sure to rotate the skewers for even cooking.
- Serve:
- Arrange the grilled chicken satay on a platter and serve with the peanut dipping sauce on the side.
- Garnish with chopped cilantro, lime wedges, or crushed peanuts if desired.
Nutritional Benefits:
- Chicken provides lean protein, which is essential for children’s muscle growth and development.
- Peanut Butter adds healthy fats and protein, supporting energy levels and brain health.
- Coconut Milk contributes good fats and a subtle sweetness that balances the spices in the dish.
- Turmeric and spices offer anti-inflammatory properties and help with digestion.
This Grilled Chicken Satay with Peanut Dipping Sauce is a fun, flavorful dish that brings a taste of Southeast Asia to your family’s table while offering balanced nutrition for children. It’s perfect for dinner or as a crowd-pleasing appetizer!
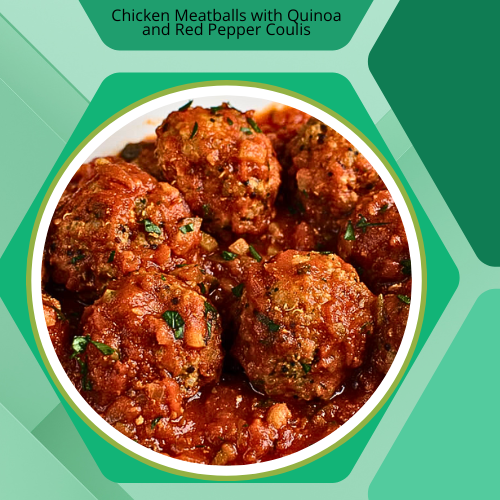
Chicken Meatballs with Quinoa and Red Pepper Coulis
Ingredients:
For the Chicken Meatballs:
- Ground Chicken: 1 lb
- Quinoa: 1/2 cup (cooked)
- Egg: 1 large
- Breadcrumbs: 1/4 cup (whole wheat or panko)
- Parmesan Cheese: 1/4 cup (optional)
- Garlic: 2 cloves, minced
- Onion: 1/4 small, finely chopped
- Fresh Parsley: 2 tablespoons, chopped
- Salt: 1 teaspoon
- Black Pepper: 1/2 teaspoon
- Olive Oil: For cooking
For the Red Pepper Coulis:
- Red Bell Peppers: 2, roasted and peeled
- Garlic: 1 clove, minced
- Olive Oil: 2 tablespoons
- Lemon Juice: 1 tablespoon
- Salt: 1/2 teaspoon
- Honey: 1 teaspoon (optional)
For the Quinoa:
- Quinoa: 1 cup (uncooked)
- Water or Broth: 2 cups
- Olive Oil: 1 tablespoon
- Salt: To taste
Instructions:
- Cook the Quinoa:
- Rinse the quinoa under cold water to remove any bitterness.
- In a pot, bring the water or broth to a boil, then add the quinoa and a pinch of salt.
- Reduce the heat to low, cover, and let it simmer for about 15 minutes, or until the quinoa is fluffy and the liquid is absorbed.
- Fluff with a fork and set aside.
- Prepare the Chicken Meatballs:
- In a large bowl, combine the ground chicken, cooked quinoa (make sure it has cooled), egg, breadcrumbs, Parmesan (if using), garlic, onion, parsley, salt, and pepper. Mix until everything is well combined.
- Form the mixture into small meatballs (about 1 inch in diameter).
- Heat olive oil in a large skillet over medium heat. Cook the meatballs in batches, turning occasionally, for about 8-10 minutes, or until browned on all sides and fully cooked through.
- Set the meatballs aside and keep warm.
- Make the Red Pepper Coulis:
- To roast the peppers, place them directly over a gas flame or under a broiler, turning occasionally until the skin is charred all over. Place them in a bowl, cover with plastic wrap, and let them steam for about 10 minutes. Then peel off the skins and remove the seeds.
- In a blender or food processor, add the roasted peppers, garlic, olive oil, lemon juice, salt, and honey (if using). Blend until smooth and creamy.
- Adjust seasoning to taste, adding more lemon juice or salt if needed.
- Assemble the Dish:
- Serve the chicken meatballs over a bed of cooked quinoa.
- Drizzle the red pepper coulis over the meatballs, or serve it on the side for dipping.
- Garnish with fresh parsley or a sprinkle of Parmesan, if desired.
Nutritional Benefits:
- Chicken provides lean protein essential for growth and muscle development.
- Quinoa is a superfood rich in protein, fiber, and essential amino acids, making it a complete protein source for growing children.
- Red Bell Peppers are packed with vitamins A and C, which support immune health and vision.
- Olive Oil adds healthy fats, contributing to brain development and overall health.
This Chicken Meatballs with Quinoa and Red Pepper Coulis recipe balances nutrition, taste, and ease of preparation. The meatballs are tender and flavorful, while the quinoa provides a wholesome grain base. The red pepper coulis adds a burst of color and a slightly sweet, tangy flavor that ties the dish together. Perfect for family dinners or even as a meal prep option!
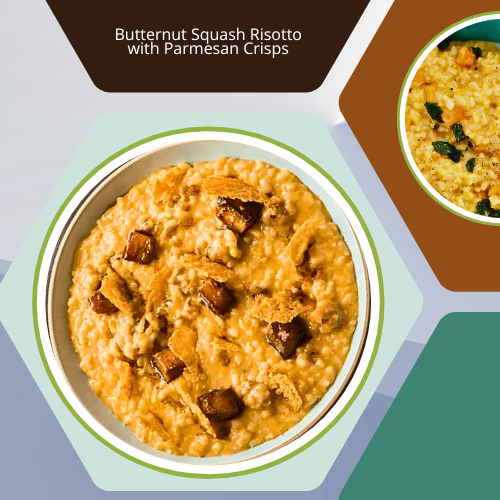
Butternut Squash Risotto with Parmesan Crisps
Ingredients:
For the Risotto:
- Arborio Rice: 1 1/2 cups
- Butternut Squash: 2 cups, peeled and cubed
- Onion: 1 small, finely chopped
- Garlic: 2 cloves, minced
- Vegetable Broth: 5 cups (warm)
- Dry White Wine: 1/2 cup (optional)
- Olive Oil: 2 tablespoons
- Butter: 2 tablespoons
- Parmesan Cheese: 1/2 cup, grated
- Fresh Thyme: 1 teaspoon (optional)
- Salt and Pepper: To taste
For the Parmesan Crisps:
- Parmesan Cheese: 1 cup, grated
- Black Pepper: To taste (optional)
Instructions:
- Roast the Butternut Squash:
- Preheat the oven to 400°F (200°C).
- Toss the cubed butternut squash with a tablespoon of olive oil, salt, and pepper. Spread on a baking sheet.
- Roast for 20-25 minutes, or until tender and lightly caramelized. Set aside.
- Prepare the Parmesan Crisps:
- Line a baking sheet with parchment paper.
- Spoon about 2 tablespoons of grated Parmesan into small piles on the sheet, flattening each into a thin circle.
- Sprinkle with black pepper if desired.
- Bake in the oven at 400°F (200°C) for 5-7 minutes or until golden and crispy. Remove and let them cool completely before handling.
- Make the Risotto:
- In a large pan, heat the remaining tablespoon of olive oil and butter over medium heat.
- Add the chopped onion and garlic, and sauté until translucent, about 5 minutes.
- Add the Arborio rice and stir to coat it in the oil and butter. Toast the rice for 2-3 minutes until slightly golden.
- Pour in the white wine (if using) and stir until it is absorbed.
- Begin adding the warm vegetable broth, one ladle at a time, stirring constantly. Allow each addition of broth to be absorbed before adding the next. Continue this process for about 18-20 minutes, until the rice is tender but still slightly al dente.
- Stir in the roasted butternut squash, Parmesan cheese, and fresh thyme (if using). Adjust seasoning with salt and pepper.
- Assemble the Dish:
- Serve the creamy risotto in bowls, topped with a Parmesan crisp on the side or crumbled over the top for added texture.
Nutritional Benefits:
- Butternut Squash is rich in vitamins A and C, both of which are important for immune support and eye health.
- Arborio Rice provides carbohydrates that give energy, making it a great base for the dish.
- Parmesan adds calcium and protein, while the crisps offer a fun and crunchy topping.
- Olive Oil and Butter add healthy fats, essential for brain development.
This Butternut Squash Risotto with Parmesan Crisps is a comforting yet sophisticated meal that highlights the sweet and savory flavors of fall ingredients. The creamy risotto pairs beautifully with the crispy Parmesan, making it a perfect dish for both children and adults alike.
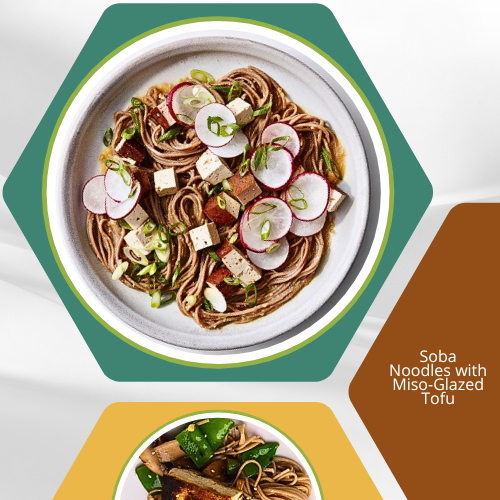
Soba Noodles with Miso-Glazed Tofu
Ingredients:
For the Miso-Glazed Tofu:
- Firm Tofu: 1 block (14 oz), pressed and cut into cubes
- Miso Paste: 2 tablespoons (white or yellow miso)
- Soy Sauce: 2 tablespoons
- Rice Vinegar: 1 tablespoon
- Sesame Oil: 1 tablespoon
- Maple Syrup or Honey: 1 tablespoon
- Garlic: 1 clove, minced
- Fresh Ginger: 1 teaspoon, grated
- Sesame Seeds: For garnish (optional)
For the Soba Noodles:
- Soba Noodles: 8 oz (about 2 bundles)
- Scallions (Green Onions): 2, thinly sliced
- Cucumber: 1 small, julienned
- Carrot: 1 medium, julienned
- Red Cabbage: 1/2 cup, shredded
- Cilantro: A handful, chopped (optional)
- Lime Wedges: For serving
For the Dressing:
- Soy Sauce: 2 tablespoons
- Rice Vinegar: 1 tablespoon
- Sesame Oil: 1 tablespoon
- Maple Syrup or Honey: 1 teaspoon
- Chili Flakes: A pinch (optional for heat)
Instructions:
- Prepare the Tofu:
- Preheat the oven to 400°F (200°C) and line a baking sheet with parchment paper.
- In a small bowl, whisk together the miso paste, soy sauce, rice vinegar, sesame oil, maple syrup (or honey), minced garlic, and grated ginger.
- Toss the tofu cubes in the miso glaze until well coated.
- Arrange the tofu cubes on the baking sheet and bake for 20-25 minutes, flipping halfway through, until the tofu is golden and slightly crispy on the edges.
- Cook the Soba Noodles:
- Bring a large pot of water to a boil. Add the soba noodles and cook according to package instructions (usually 4-5 minutes). Be careful not to overcook them.
- Drain and rinse the noodles under cold water to stop the cooking process and remove excess starch. Set aside.
- Prepare the Dressing:
- In a small bowl, whisk together the soy sauce, rice vinegar, sesame oil, maple syrup (or honey), and chili flakes (if using).
- Assemble the Dish:
- In a large mixing bowl, toss the cooked soba noodles with the dressing until evenly coated.
- Add the sliced scallions, julienned cucumber, carrot, and shredded red cabbage. Toss gently to combine.
- Divide the noodle salad into bowls and top each serving with a few pieces of the miso-glazed tofu.
- Garnish with sesame seeds, chopped cilantro (if using), and a squeeze of fresh lime juice.
Nutritional Benefits:
- Soba Noodles are made from buckwheat, which is rich in fiber and offers a gluten-free alternative to traditional pasta.
- Tofu provides plant-based protein and is an excellent source of iron and calcium.
- Miso is a fermented food that supports gut health and adds a deep umami flavor.
- Fresh Veggies like cucumber, carrot, and cabbage provide essential vitamins and minerals, adding crunch and nutrition to the dish.
- Sesame Oil and Soy Sauce add healthy fats and a touch of umami richness.
This Soba Noodles with Miso-Glazed Tofu recipe offers a satisfying and sophisticated blend of textures and flavors. The miso-glazed tofu adds a savory punch, while the fresh vegetables and light soba noodles keep the dish refreshing. Perfect for a quick, nutritious, and delicious meal!
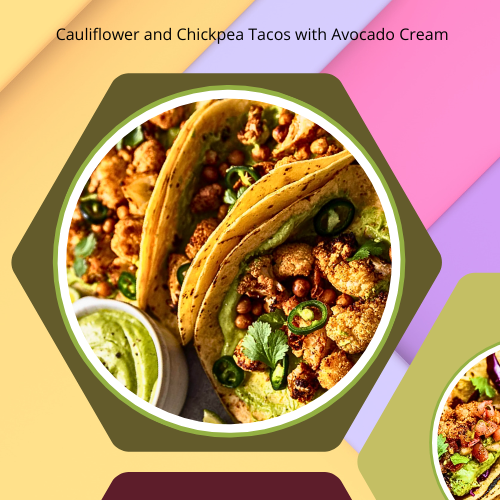
Cauliflower and Chickpea Tacos with Avocado Cream
Ingredients:
For the Roasted Cauliflower and Chickpeas:
- Cauliflower: 1 medium head, cut into small florets
- Chickpeas: 1 can (15 oz), drained and rinsed
- Olive Oil: 2 tablespoons
- Cumin: 1 teaspoon
- Smoked Paprika: 1 teaspoon
- Chili Powder: 1/2 teaspoon
- Garlic Powder: 1/2 teaspoon
- Salt: 1/2 teaspoon
- Black Pepper: 1/4 teaspoon
- Fresh Cilantro: For garnish, chopped (optional)
For the Avocado Cream:
- Avocado: 1 large, ripe
- Greek Yogurt: 1/4 cup (can use a dairy-free option)
- Lime Juice: 2 tablespoons
- Garlic: 1 small clove, minced
- Salt: 1/4 teaspoon
- Water: 1-2 tablespoons (to thin as needed)
For Serving:
- Small Corn or Flour Tortillas: 8-10
- Red Cabbage: 1/2 cup, shredded (for crunch)
- Radishes: 3-4, thinly sliced
- Pickled Red Onions: 1/4 cup (optional)
- Lime Wedges: For garnish
Instructions:
- Roast the Cauliflower and Chickpeas:
- Preheat the oven to 425°F (220°C) and line a baking sheet with parchment paper.
- In a large bowl, toss the cauliflower florets and chickpeas with olive oil, cumin, smoked paprika, chili powder, garlic powder, salt, and black pepper until well coated.
- Spread the mixture in an even layer on the prepared baking sheet.
- Roast for 25-30 minutes, stirring halfway through, until the cauliflower is tender and the chickpeas are crispy.
- Prepare the Avocado Cream:
- In a blender or food processor, combine the avocado, Greek yogurt, lime juice, minced garlic, and salt. Blend until smooth and creamy.
- Add water, 1 tablespoon at a time, to achieve your desired consistency for drizzling.
- Taste and adjust seasoning if needed.
- Warm the Tortillas:
- Heat the tortillas in a dry skillet over medium heat for about 30 seconds per side or wrap them in foil and warm in the oven for 5-7 minutes.
- Assemble the Tacos:
- Spread a spoonful of avocado cream onto each warm tortilla.
- Top with a generous serving of the roasted cauliflower and chickpeas.
- Add shredded red cabbage, radish slices, and pickled red onions for extra texture and flavor.
- Drizzle more avocado cream on top and garnish with fresh cilantro and a squeeze of lime juice.
Nutritional Benefits:
- Cauliflower is rich in fiber, antioxidants, and vitamins C and K, making it an excellent base for plant-based meals.
- Chickpeas provide plant-based protein, fiber, and essential minerals like iron and magnesium.
- Avocado adds healthy fats, particularly monounsaturated fats, which are good for heart health.
- Greek Yogurt (or a dairy-free alternative) in the avocado cream contributes protein and probiotics for gut health.
- Fresh Veggies like red cabbage and radishes add crunch, vitamins, and antioxidants to the dish.
This Cauliflower and Chickpea Tacos with Avocado Cream recipe is a delicious, nutritious, and modern twist on traditional tacos. The roasted cauliflower and chickpeas offer a hearty, satisfying filling, while the avocado cream adds a rich, tangy balance. Perfect for a healthy weeknight meal or a crowd-pleasing taco night!
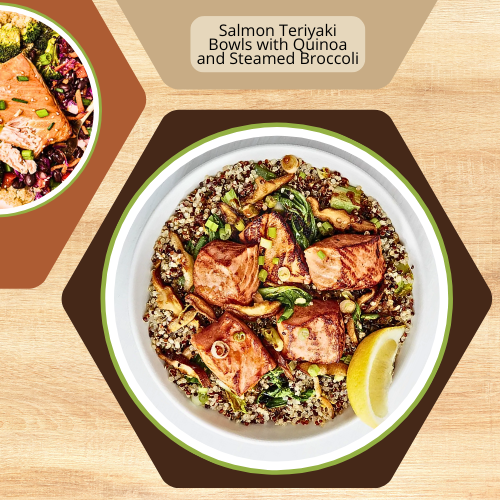
Salmon Teriyaki Bowls with Quinoa and Steamed Broccoli
Ingredients:
- 2 salmon fillets
- 1 cup quinoa
- 2 cups broccoli florets
- 2 tbsp soy sauce (low sodium)
- 2 tbsp honey or maple syrup
- 1 tbsp rice vinegar
- 1 garlic clove (minced)
- 1 tsp grated ginger
- 1 tsp sesame oil
- 1 tbsp sesame seeds (optional)
- 2 green onions (sliced)
- Salt and pepper (to taste)
Instructions:
- Cook the Quinoa:
- Rinse 1 cup of quinoa under cold water.
- In a pot, add quinoa and 2 cups of water. Bring to a boil, then reduce to a simmer.
- Cover and cook for about 15 minutes, or until the water is absorbed and the quinoa is fluffy. Set aside.
- Prepare the Teriyaki Sauce:
- In a small bowl, whisk together soy sauce, honey (or maple syrup), rice vinegar, minced garlic, and grated ginger.
- Cook the Salmon:
- Preheat a skillet over medium heat and add sesame oil.
- Season the salmon fillets with a pinch of salt and pepper.
- Sear the salmon for about 3-4 minutes on each side, until cooked through and slightly crispy on the outside.
- Once cooked, pour half of the teriyaki sauce over the salmon and let it simmer for a minute. Remove the salmon from heat and set aside.
- Steam the Broccoli:
- In a steamer or a pot with a steaming basket, steam the broccoli florets for 5-7 minutes until they are tender but still bright green.
- Assemble the Bowl:
- Divide the cooked quinoa into bowls.
- Place the salmon fillets on top, drizzle with the remaining teriyaki sauce.
- Add the steamed broccoli on the side.
- Garnish with sesame seeds and sliced green onions.
Nutritional Benefits:
- Salmon: Rich in omega-3 fatty acids, essential for brain health and development.
- Quinoa: A high-protein grain, providing fiber and all nine essential amino acids.
- Broccoli: A powerhouse of vitamins C and K, along with fiber and antioxidants.
Serving Suggestion:
This dish is perfect for introducing kids to savory, sweet, and umami flavors in a balanced, nutrient-dense way. You can also offer a side of cucumber salad or lightly pickled vegetables for an extra crunch.
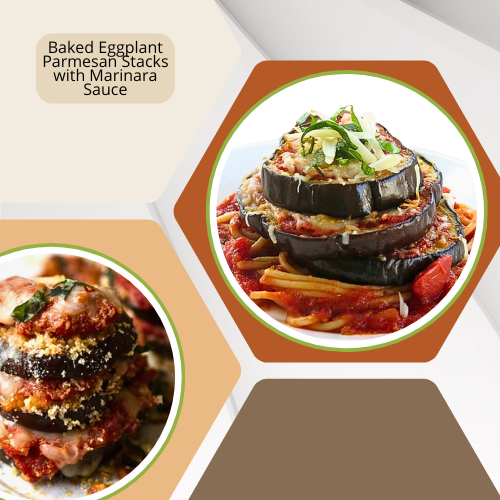
Baked Eggplant Parmesan Stacks with Marinara Sauce
Ingredients:
- 2 large eggplants (sliced into 1/2-inch rounds)
- 1 1/2 cups marinara sauce (store-bought or homemade)
- 1 1/2 cups mozzarella cheese (shredded)
- 1/2 cup grated Parmesan cheese
- 1 cup panko breadcrumbs
- 1/2 cup flour
- 2 large eggs (beaten)
- 1 tbsp olive oil (for drizzling)
- 1 tsp dried oregano
- 1 tsp dried basil
- Salt and pepper (to taste)
- Fresh basil leaves (for garnish)
Instructions:
- Preheat the Oven:
- Preheat the oven to 400°F (200°C). Line two baking sheets with parchment paper or lightly grease them.
- Prepare the Eggplant:
- Lightly salt both sides of the eggplant slices and let them sit for 20 minutes to draw out excess moisture. Pat them dry with a paper towel.
- Bread the Eggplant Slices:
- Set up three bowls: one with flour, one with the beaten eggs, and one with panko breadcrumbs mixed with dried oregano and basil.
- Dip each eggplant slice in the flour, then the eggs, and finally coat it in the breadcrumb mixture.
- Bake the Eggplant:
- Place the breaded eggplant slices on the prepared baking sheets. Lightly drizzle with olive oil.
- Bake for 20 minutes, flipping the slices halfway through, until golden and crispy.
- Assemble the Stacks:
- In a baking dish, spread a thin layer of marinara sauce.
- Create stacks by layering a baked eggplant slice, a spoonful of marinara sauce, and a sprinkle of mozzarella and Parmesan cheese.
- Repeat the layers (about 2-3 layers per stack) and finish with a final sprinkle of cheese on top.
- Bake the Stacks:
- Place the assembled stacks back in the oven and bake for 10-12 minutes, or until the cheese is melted and bubbly.
- Garnish and Serve:
- Remove from the oven and let the stacks cool for a few minutes.
- Garnish with fresh basil leaves before serving.
Nutritional Benefits:
- Eggplant: Rich in fiber, vitamins B1 and B6, and antioxidants.
- Mozzarella and Parmesan: Provide calcium and protein, promoting healthy bones and growth.
- Marinara Sauce: Offers a good source of vitamin C and lycopene from tomatoes.
Serving Suggestion:
Serve these eggplant Parmesan stacks with a simple side of mixed greens or whole grain pasta for a complete meal that balances nutrition and flavor, appealing to both kids and adults.
Polenta Squares with Ratatouille and Grated Parmesan
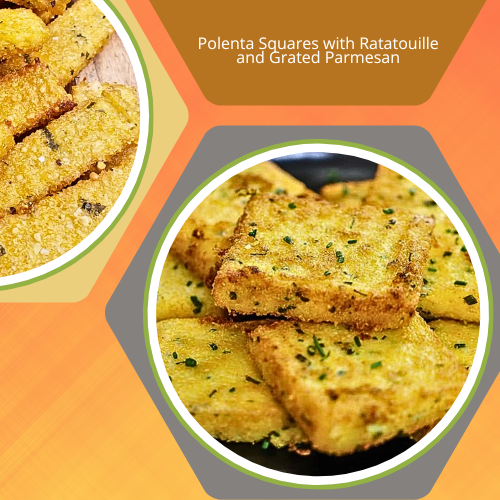
This colorful and nutritious recipe introduces kids to the Mediterranean flavors of ratatouille, paired with crispy polenta squares and a sprinkle of Parmesan. It’s a fun and sophisticated dish that balances health with taste, while exposing children to a variety of vegetables.
Ingredients:
For the Polenta:
- 1 cup yellow cornmeal (polenta)
- 4 cups vegetable broth (or water)
- 2 tbsp unsalted butter
- 1/4 cup grated Parmesan cheese
- Salt and pepper (to taste)
- Olive oil (for greasing)
For the Ratatouille:
- 1 small eggplant (cubed)
- 1 zucchini (cubed)
- 1 red bell pepper (cubed)
- 1 yellow bell pepper (cubed)
- 1 red onion (diced)
- 2 cloves garlic (minced)
- 2 cups diced tomatoes (fresh or canned)
- 2 tbsp olive oil
- 1 tsp dried thyme
- 1 tsp dried basil
- Salt and pepper (to taste)
- Fresh basil (for garnish)
For Topping:
- 1/4 cup grated Parmesan cheese (extra for sprinkling)
- Fresh parsley or basil leaves (for garnish)
Instructions:
- Prepare the Polenta:
- In a saucepan, bring the vegetable broth to a boil. Slowly whisk in the cornmeal to avoid lumps.
- Lower the heat and cook the polenta, stirring frequently, for about 20 minutes or until it thickens.
- Stir in the butter, grated Parmesan, and season with salt and pepper.
- Once the polenta is smooth and creamy, pour it into a greased square baking dish (about 9×9 inches). Spread it evenly and allow it to cool and firm up for at least 30 minutes.
- Prepare the Ratatouille:
- In a large pan, heat the olive oil over medium heat. Add the diced onions and minced garlic, and sauté until soft and fragrant.
- Add the eggplant, zucchini, red and yellow bell peppers, and sauté for 5-7 minutes until the vegetables start to soften.
- Add the diced tomatoes, thyme, basil, salt, and pepper. Cook for another 10-15 minutes, stirring occasionally, until the vegetables are tender and the sauce thickens.
- Adjust seasoning if needed, then remove from heat.
- Cut and Grill the Polenta:
- Once the polenta is firm, cut it into squares or rectangles.
- Heat a lightly oiled grill pan or skillet over medium-high heat. Grill the polenta squares for about 2-3 minutes on each side until they are golden and crispy.
- Assemble the Dish:
- Place the grilled polenta squares on a serving plate.
- Spoon a generous amount of ratatouille over each square.
- Sprinkle with extra grated Parmesan cheese and garnish with fresh parsley or basil leaves.
Nutritional Benefits:
- Polenta: A gluten-free whole grain option rich in fiber and essential minerals like iron and magnesium.
- Ratatouille Vegetables: A powerhouse of vitamins (A, C, K) and antioxidants, supporting immune function and growth.
- Parmesan Cheese: Provides calcium and protein for bone health.
Serving Suggestion:
This dish can be served as a main course or a side. Pair it with a light green salad for a complete meal, and it’s a great way to get children excited about eating more vegetables in a fun and flavorful way.
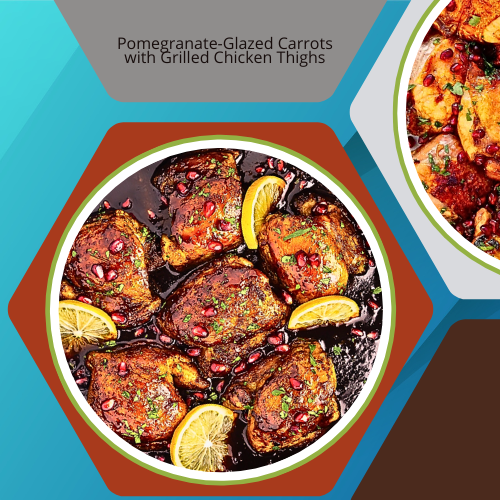
Pomegranate-Glazed Carrots with Grilled Chicken Thighs
Ingredients:
For the Pomegranate-Glazed Carrots:
- 6-8 medium carrots (peeled and cut into sticks)
- 1/2 cup pomegranate juice
- 2 tbsp honey (or maple syrup for a vegan option)
- 1 tbsp olive oil
- 1 tbsp balsamic vinegar
- 1 tsp ground cinnamon
- Salt and pepper (to taste)
- Pomegranate seeds (for garnish)
- Fresh parsley or mint (for garnish)
For the Grilled Chicken Thighs:
- 4 boneless, skinless chicken thighs
- 2 tbsp olive oil
- 1 tsp smoked paprika
- 1 tsp garlic powder
- 1/2 tsp ground cumin
- Salt and pepper (to taste)
- Lemon wedges (for serving)
Instructions:
- Prepare the Chicken:
- In a small bowl, mix together the olive oil, smoked paprika, garlic powder, cumin, salt, and pepper.
- Rub the spice mixture all over the chicken thighs, ensuring they are well coated.
- Preheat your grill or grill pan over medium-high heat. Grill the chicken thighs for 5-7 minutes per side, or until fully cooked through (internal temperature should reach 165°F/75°C).
- Once done, remove from heat and cover to keep warm.
- Make the Pomegranate-Glazed Carrots:
- While the chicken is grilling, prepare the glazed carrots. Heat olive oil in a large pan over medium heat.
- Add the carrot sticks and sauté for 5-6 minutes until they begin to soften.
- In a small bowl, whisk together pomegranate juice, honey, balsamic vinegar, and cinnamon. Pour the mixture over the carrots.
- Reduce the heat to low and let the carrots simmer in the glaze for 10-12 minutes, stirring occasionally, until they are tender and the glaze has reduced and thickened.
- Season with salt and pepper to taste.
- Assemble the Dish:
- Place the grilled chicken thighs on a serving plate. Drizzle with lemon juice for a bright, fresh flavor.
- Serve the pomegranate-glazed carrots alongside the chicken, garnishing with fresh pomegranate seeds and parsley or mint for added texture and color.
Nutritional Benefits:
- Carrots: High in beta-carotene, supporting eye health and immune function.
- Pomegranate: Rich in antioxidants, which promote heart health and reduce inflammation.
- Chicken Thighs: A good source of protein and essential vitamins like B6 and niacin, which support energy metabolism.
Serving Suggestions:
Serve this dish with a side of couscous or quinoa for a complete meal, or pair it with a fresh green salad. The combination of flavors and textures will introduce kids to more complex tastes while keeping the dish approachable and delicious.
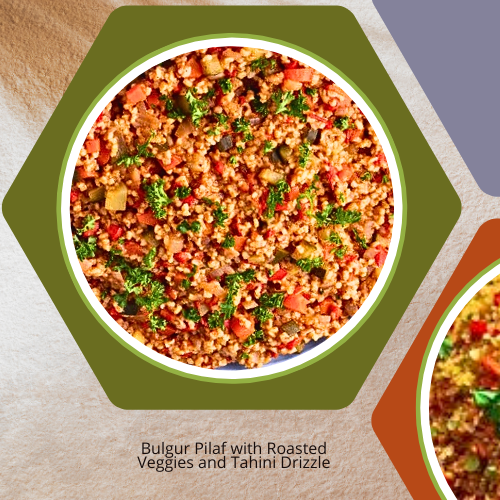
Bulgur Pilaf with Roasted Veggies and Tahini Drizzle
Ingredients:
For the Bulgur Pilaf:
- 1 cup bulgur wheat
- 2 cups vegetable broth (or water)
- 1 tbsp olive oil
- 1 small onion (finely chopped)
- 2 garlic cloves (minced)
- 1/2 tsp ground cumin
- Salt and pepper (to taste)
- Fresh parsley (chopped, for garnish)
For the Roasted Veggies:
- 1 small zucchini (cut into cubes)
- 1 small eggplant (cut into cubes)
- 1 red bell pepper (cut into strips)
- 1 small red onion (cut into wedges)
- 2 tbsp olive oil
- 1 tsp smoked paprika
- Salt and pepper (to taste)
For the Tahini Drizzle:
- 1/4 cup tahini
- 2 tbsp lemon juice
- 1 garlic clove (minced)
- 2-3 tbsp water (adjust for consistency)
- Salt (to taste)
Instructions:
- Cook the Bulgur Pilaf:
- Heat olive oil in a medium pot over medium heat. Add the chopped onion and garlic, sautéing until soft and fragrant, about 3-4 minutes.
- Add the cumin and stir to coat the onions and garlic.
- Pour in the bulgur and stir for 1-2 minutes to lightly toast it.
- Add vegetable broth (or water) and bring to a boil. Reduce heat to low, cover, and simmer for about 12-15 minutes until the bulgur is tender and has absorbed the liquid.
- Fluff with a fork, season with salt and pepper to taste, and set aside.
- Roast the Vegetables:
- Preheat the oven to 400°F (200°C).
- Toss the zucchini, eggplant, bell pepper, and red onion in olive oil, smoked paprika, salt, and pepper.
- Spread the vegetables in a single layer on a baking sheet. Roast for 20-25 minutes, turning halfway through, until the veggies are tender and lightly caramelized.
- Make the Tahini Drizzle:
- In a small bowl, whisk together the tahini, lemon juice, garlic, and a pinch of salt.
- Add water, one tablespoon at a time, until you reach your desired consistency for drizzling.
- Assemble the Dish:
- Spread the cooked bulgur pilaf on a large serving plate.
- Arrange the roasted vegetables on top of the bulgur.
- Drizzle generously with the tahini sauce.
- Garnish with fresh parsley and an extra sprinkle of smoked paprika, if desired.
Nutritional Benefits:
- Bulgur: A whole grain rich in fiber, supporting digestive health and keeping kids full longer.
- Roasted Veggies: High in vitamins, minerals, and antioxidants, which support overall health and immunity.
- Tahini: A good source of healthy fats and protein, helping to build strong bones and muscles.
Serving Suggestions:
This dish can be enjoyed warm or at room temperature, making it perfect for school lunches or family dinners. Serve with a side of Greek yogurt or a simple green salad for added freshness and protein. The rich flavors of the roasted vegetables and creamy tahini drizzle will keep kids excited about this wholesome meal.
FAQs: AI for Child Nutrition
- How does AI improve child nutrition?
AI analyzes a child’s needs and offers custom meal plans. - Can AI detect malnutrition?
Yes, AI can spot early signs of malnutrition and suggest solutions. - What are food chatbots?
AI food chatbots offer custom dietary advice and answer nutrition questions. - Is AI safe for children’s meal planning?
Yes, but it should be used with professional advice. - How can AI help prevent childhood obesity?
AI tracks eating habits and suggests healthier options. - Can AI improve food security in rural areas?
Yes, AI maps food security and offers solutions based on local foods. - Are there ethical concerns about AI in child nutrition?
Yes, including privacy and the misuse of AI to market unhealthy foods. - Can AI diets respect cultural preferences?
Yes, AI can create meal plans based on culture and dietary needs. - How can AI improve school nutrition programs?
AI tracks school meals and suggests improvements to meet nutrition standards. - Can AI help parents choose healthier food for their children?
Yes, AI offers custom advice to help families make better food choices.
Conclusion
AI for Child Nutrition has the potential to fight malnutrition and unhealthy eating habits. It helps parents create balanced, nutritious meals for their children. As AI develops, it will provide even more personalized solutions for families around the world.
You might also like:
- Delightful and Nutritious: Kid-Approved Meals That Balance Flavor and Health
- The Importance of Balanced Diets for Young Children
- Allergy-Friendly Recipes
- Healthy Eating Habits for Kids: 20 Top Tips to Promote Growth, Development, and Lifelong Wellness.
- Recipes Kids Can Help Make