

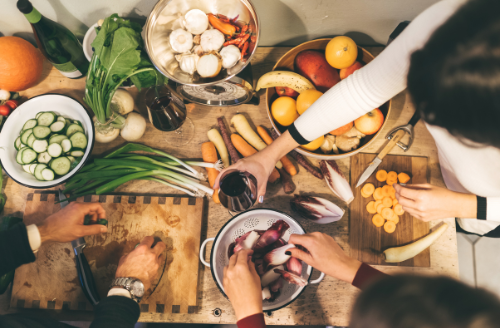
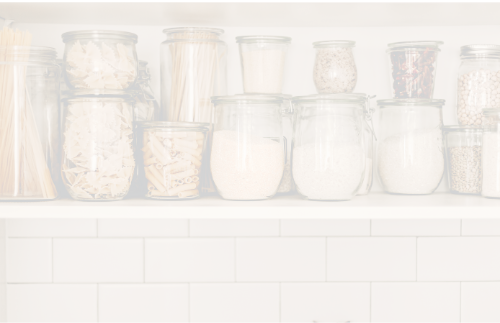
When it comes to preparing quick, healthy, and delicious meals, having a well-stocked pantry is key. Kitchen staples serve as the foundation for most recipes, offering convenience and flexibility in meal preparation. Stocking up on essential pantry ingredients not only saves time but also reduces trips to the grocery store. These recipes are considered a continuation of what was previously presented. In this guide, we’ll explore the top kitchen staples every home chef should have, including pantry essentials you can make from scratch for healthier and more affordable options.
(N.B: If you enjoy printing your favorite recipes or keeping them organized in one convenient place, click the button at the bottom of the page to download the « Essential Guide To Kitchen Staples » E-book)
Must-Have Kitchen Staples for Fast & Easy Dinners
The first step to building a well-stocked kitchen is knowing which kitchen staples you can’t live without. Essentials like grains, oils, and canned goods are the backbone of quick, easy dinners. Healthy kitchen staples like olive oil, whole grains, and organic spices make it easy to whip up nutritious meals in no time. Moreover, stocking pantry essentials allows for flexibility in creating recipes, helping you avoid last-minute grocery runs.
Homemade vs Store-Bought: Healthier Pantry Staples You Can Make at Home
Many kitchen staples can be made from scratch, offering healthier alternatives to store-bought options. For example, homemade mozzarella is fresher and free of preservatives, making it a great addition to your pantry staples. Homestead pantry staples like homemade sauces, stocks, and mixes are not only healthier but also more affordable. Pantry staples that are cheaper and healthier homemade include salad dressings, bread, and even granola. By making these at home, you control the ingredients and avoid unhealthy additives.
Fundamental Kitchen Staples to Keep in Your Pantry
To ensure you’re always prepared, create a kitchen pantry grocery list of essential items to keep on hand. Some must-have essentials for stocking a pantry include canned tomatoes, beans, rice, pasta, and various spices. These pantry staples are versatile and can be used in a variety of recipes. Additionally, consider adding organic pantry items like nuts, seeds, and dried fruits to your list for healthy snacking and cooking.
DIY Kitchen Staples: A Healthier and More Affordable Approach
Many everyday kitchen pantry staples are easy to make at home. From homemade pantry mixes to DIY spice blends, these options can save money and offer better taste and nutrition. Favorite homemade pantry staples include pancake mix, granola, and salad dressings, all of which can be prepared in bulk and stored for future use. Consequently, incorporating DIY options into your pantry not only cuts costs but also improves the quality of your meals.
Essential Kitchen Staples to Help You Cook Healthier Meals
Stocking healthy kitchen staples ensures you always have the right ingredients for nutritious meals. Lot of kitchen staples for quick and healthy meals include quinoa, brown rice, and lentils, all of which can be easily paired with fresh or frozen vegetables for a balanced dinner. By keeping these pantry essentials in your kitchen, you make it easier to choose healthy options over processed foods.
Pantry Staples That Are Cheaper to Make
Certain kitchen staples are cheaper to make at home than to buy. For instance, homemade instead of store-bought options like salsa, tomato sauce, and broth are not only cost-effective but also healthier. Top pantry staples that are healthier and cheaper homemade include hummus, nut butter, and even tortillas. With a little preparation, you can have a pantry full of homemade goodness that rivals anything you’d find at the store.
Recipes Using Pantry Staples
One of the benefits of having a well-stocked pantry is the ability to create meals on the fly. Recipes using pantry staples often combine common ingredients like canned beans, pasta, and spices to create delicious dishes. For example, a simple pasta dish with olive oil, garlic, and canned tomatoes can be transformed into a hearty meal. Easy ideas to try include soups, stir-fries, and casseroles made with items you already have in your pantry.
Conclusion: Stocking Your Kitchen Staples for Succes
Incorporating a range of kitchen staples into your pantry helps make meal prep faster, healthier, and more cost-effective. Whether you’re making pantry staples you can DIY or purchasing essential pantry ingredients, having the right items on hand is crucial for success in the kitchen. From homemade pantry mixes to healthy kitchen staples, stocking your pantry thoughtfully will allow you to cook delicious meals with ease, ensuring you never run out of options when it’s time to prepare dinner.
DIY Kitchen Staples: Easy Recipes for Your Pantry
Homemade Peanut Butter
Kitchen Staples: A Nutritious Spread Great for Sandwiches or Dipping Fruits
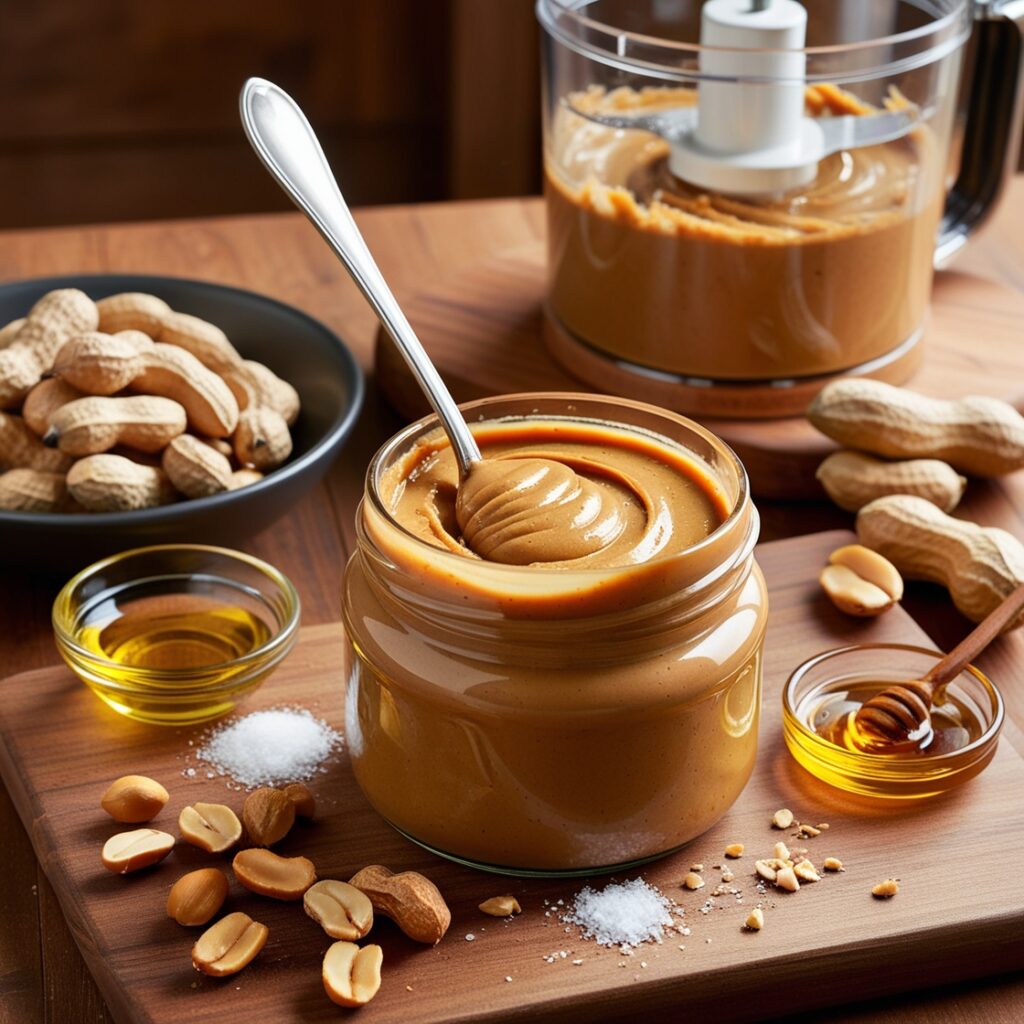
2 cups roasted peanuts (unsalted or salted based on preference)
1-2 tablespoons of peanut oil (optional, for creamier texture)
1/2 teaspoon of salt (optional, adjust based on taste and if peanuts are unsalted)
1 tablespoon honey (optional, for sweetness)
Instructions:
Step 1: Prepare the Peanuts
Choose Roasted Peanuts: Start with 2 cups of roasted peanuts. You can either buy pre-roasted peanuts or roast raw peanuts in the oven.
To roast raw peanuts: Spread the peanuts on a baking sheet and roast at 350°F (175°C) for 10-15 minutes, stirring occasionally until golden and fragrant. Let them cool for 5 minutes before using.
Step 2: Blend the Peanuts
Add to Food Processor: Place the roasted peanuts in a food processor.
Pulse: Start by pulsing the peanuts a few times to break them down. Gradually, the peanuts will move from a crumbly texture to a thick paste.
Process Continuously: Keep processing for about 3-5 minutes. First, the peanuts will become powdery, then will release their natural oils, turning into a creamy butter.
Step 3: Adjust Texture and Flavor
Add Peanut Oil (Optional): If you prefer a creamier peanut butter, add 1-2 tablespoons of peanut oil to the mixture. Process for another minute until the desired consistency is reached.
Add Sweeteners (Optional): If you like your peanut butter a bit sweet, add 1 tablespoon of honey and process until mixed.
Season with Salt (Optional): Add 1/2 teaspoon of salt, or adjust to taste if you used unsalted peanuts.
Step 4: Store the Peanut Butter
Transfer to Jar: Scoop the peanut butter into an airtight glass jar or container.
Refrigerate for Freshness: Store the homemade peanut butter in the refrigerator to extend its shelf life. It should last for 2-3 weeks. Stir before each use, as natural oils may separate over time.
Usage:
This homemade peanut butter is perfect for making sandwiches, dipping fruits or vegetables, or even adding to smoothies. Enjoy the smooth, creamy texture and the wholesome flavor of a nutritious, homemade spread!
Vegetable Chips
Kitchen Staples: Crispy Baked Alternatives to Store-Bought Snacks
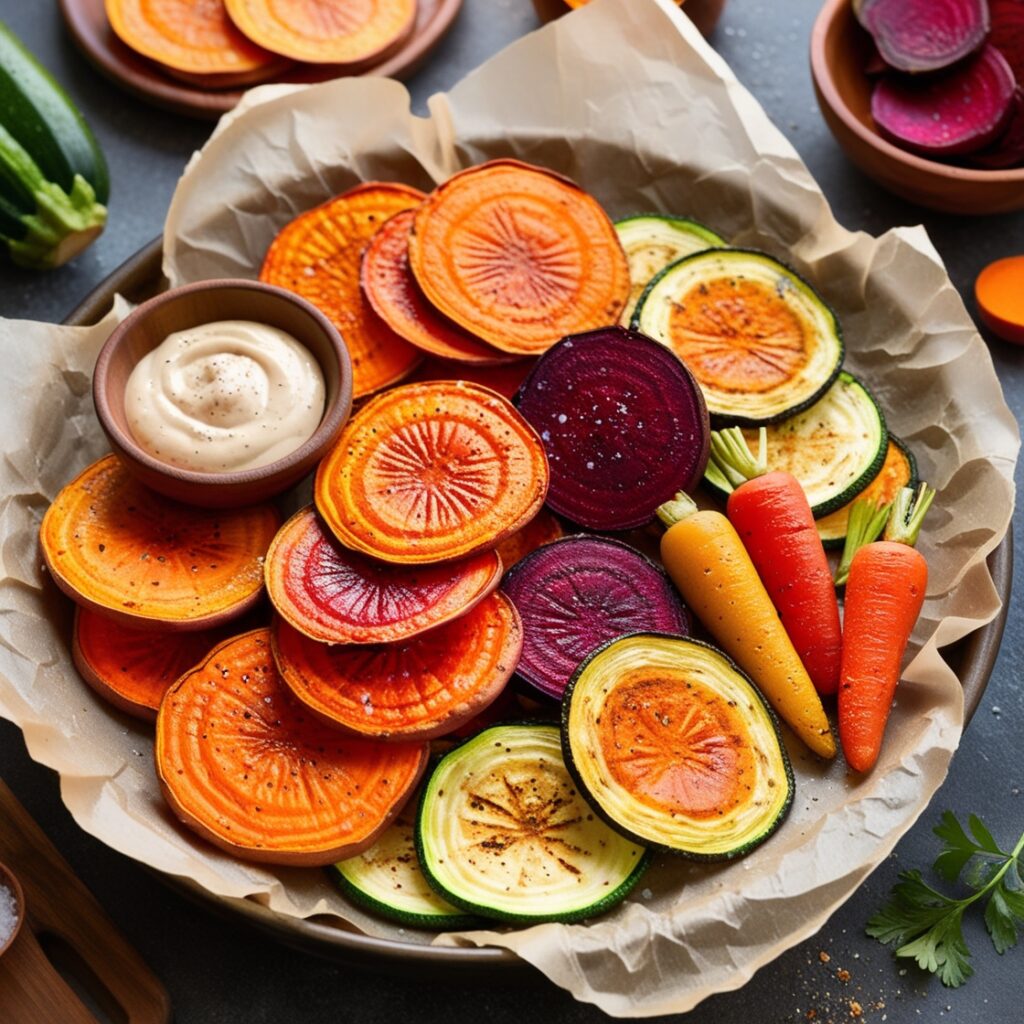
2 medium sweet potatoes
2 medium beets
2 medium zucchinis
2 medium carrots
1 tablespoon olive oil (or any preferred vegetable oil)
1 teaspoon sea salt (adjust to taste)
1/2 teaspoon black pepper (optional)
1/2 teaspoon paprika (optional, for added flavor)
1/4 teaspoon garlic powder (optional)
Instructions:
Step 1: Preheat the Oven
Set the oven to 375°F (190°C) and allow it to preheat. Line two large baking sheets with parchment paper to prevent sticking and for easy cleanup.
Step 2: Prepare the Vegetables
Wash and dry all vegetables thoroughly.
Slice the vegetables thinly and uniformly, using a sharp knife or a mandoline slicer. Aim for slices about 1/8 inch thick. Thin, even slices ensure that all chips cook evenly and become crispy.
Step 3: Season the Vegetable Slices
Toss the vegetable slices in a large bowl with olive oil, ensuring all slices are lightly coated. You want enough oil to promote crispiness but not too much to make the chips soggy.
Add seasonings like sea salt, black pepper, paprika, and garlic powder. Mix well to distribute the flavors evenly across all slices.
Step 4: Arrange the Vegetable Slices on Baking Sheets
Place the vegetable slices in a single layer on the prepared baking sheets, making sure they don’t overlap. Overlapping will prevent them from crisping up properly.
Step 5: Bake the Vegetable Chips
Bake in the preheated oven for about 15-20 minutes.
Rotate the baking sheets halfway through to ensure even cooking.
Keep an eye on the chips after 15 minutes as the cooking time can vary depending on thickness and type of vegetable.
The chips should become golden and crisp, but not burnt. Some vegetables like sweet potatoes may take a bit longer to cook, while others like zucchinis may finish sooner.
Step 6: Cool the Chips
Remove the chips from the oven when they are crispy and slightly golden.
Transfer to a cooling rack to cool completely. This will help them stay crisp.
Step 7: Serve and Store
Enjoy the vegetable chips fresh for the best crunch. Serve as a snack, with dips, or as a side dish.
Store any leftovers in an airtight container for up to 3-4 days. For extra crispiness, store them at room temperature rather than in the fridge.
Tips:
- Slice evenly: Thin, even slices are the key to achieving a perfect, crispy texture.
- Monitor cooking times: Different vegetables may require slightly different cooking times, so keep an eye on the chips, especially near the end.
- Experiment with flavors: Feel free to add spices like rosemary, thyme, or cumin for extra flavor.
- These baked vegetable chips are a healthy, homemade alternative to store-bought snacks, providing a crunchy treat without the extra fats and preservatives. Enjoy!
Fruit Syrup
Kitchen Staples: Freshly Made Fruit Syrup for Drizzling on Pancakes or Waffles
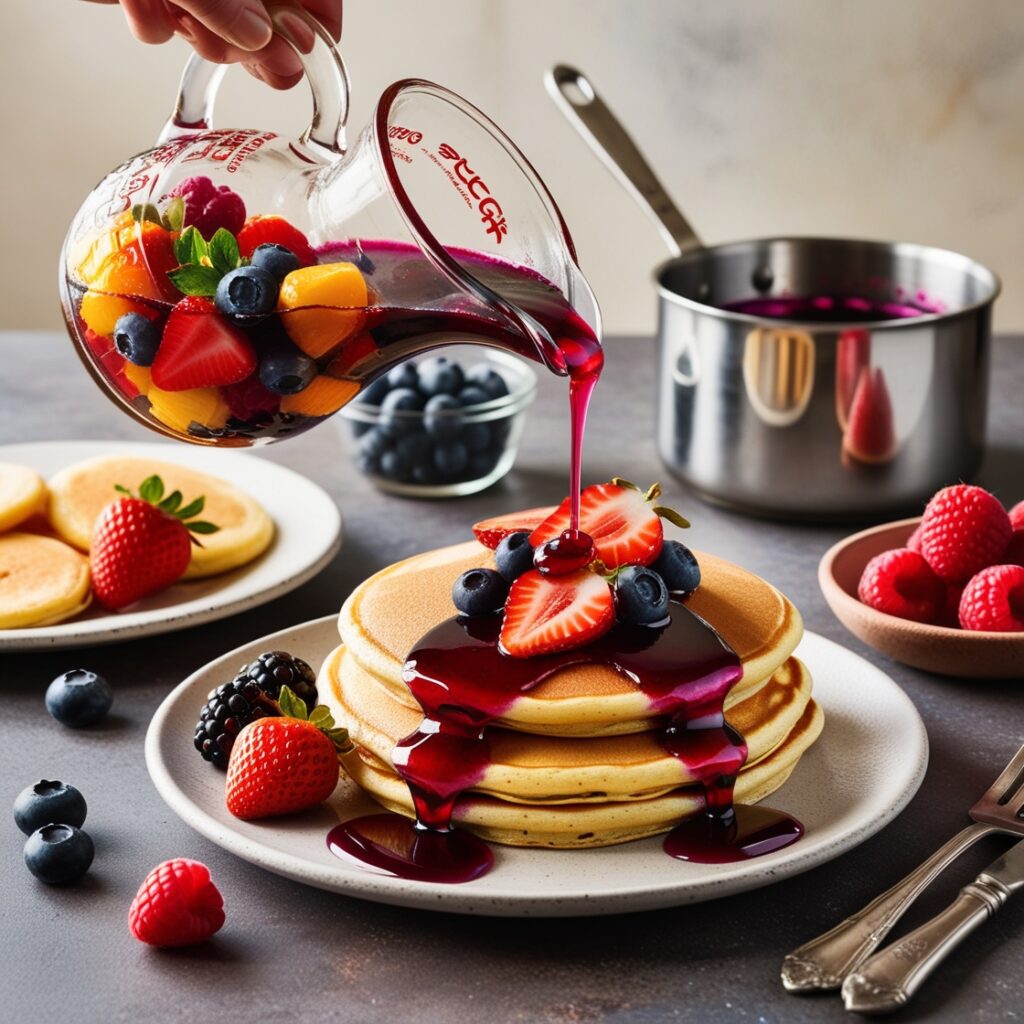
2 cups fresh fruit (such as strawberries, blueberries, raspberries, or peaches)
1 cup granulated sugar
1 cup water
1 teaspoon vanilla extract (optional)
1 tablespoon lemon juice (optional, to enhance flavor)
Instructions:
Step 1: Prepare the Fruit
Wash the fruit thoroughly under cold water.
If using larger fruits like strawberries or peaches, hull and slice them into smaller pieces.
Measure out 2 cups of the prepared fruit and set aside.
Step 2: Combine Ingredients
In a medium saucepan, combine the fruit, sugar, and water.
If desired, add the vanilla extract and lemon juice for added flavor.
Step 3: Cook the Mixture
Place the saucepan over medium heat.
Stir the mixture gently until the sugar is fully dissolved.
Once the syrup begins to bubble, reduce the heat to low and let it simmer for about 10-15 minutes. This allows the flavors to meld and the fruit to break down.
Step 4: Mash the Fruit
Using a potato masher or fork, gently mash the fruit in the saucepan. This helps release more flavor and create a thicker syrup.
Continue simmering for an additional 5-10 minutes until the syrup reaches your desired consistency.
Step 5: Strain the Syrup (Optional)
If you prefer a smoother syrup, strain the mixture through a fine mesh sieve or cheesecloth into a bowl or jar. Use the back of a spoon to press the fruit against the sieve to extract as much liquid as possible.
If you enjoy a chunkier syrup, you can skip this step.
Step 6: Cool and Store
Allow the syrup to cool to room temperature.
Transfer the syrup to a clean glass jar or airtight container.
Store in the refrigerator for up to two weeks.
Step 7: Serve
Drizzle the freshly made fruit syrup over pancakes, waffles, or yogurt.
It can also be used as a topping for ice cream or incorporated into desserts.
Tips:
- Feel free to mix different types of fruits for a unique flavor.
- Adjust the sweetness by adding more or less sugar according to your preference.
- For a thicker syrup, simmer it longer until it reduces to your desired consistency.
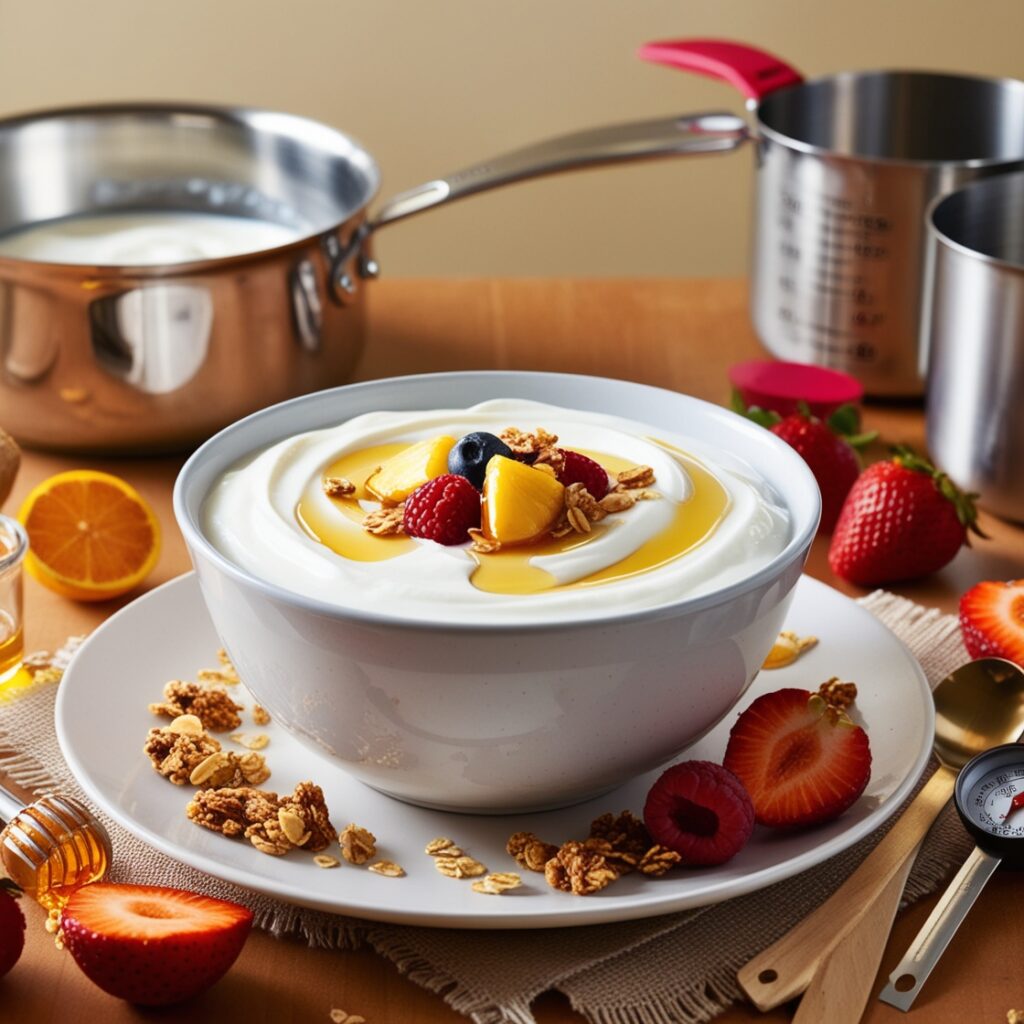
Yogurt
Kitchen Staples: Homemade Probiotic-Rich Yogurt for Delicious Breakfasts and Snacks
4 cups milk (whole, 2%, or skim)
1/2 cup plain yogurt (with live active cultures)
Optional: sweeteners (honey, sugar, or maple syrup), vanilla extract, or fruit for flavoring
Instructions:
Step 1: Prepare the Milk
Heat the Milk: Pour 4 cups of milk into a saucepan. Heat the milk over medium heat until it reaches about 180°F (82°C). This helps kill any unwanted bacteria and prepares the milk for culturing.
Cool the Milk: Once heated, remove the saucepan from the heat and let the milk cool to about 110°F (43°C). You can check the temperature with a kitchen thermometer.
Step 2: Add the Yogurt Starter
Mix the Yogurt: In a small bowl, combine 1/2 cup of plain yogurt with a few tablespoons of the cooled milk. Whisk until smooth.
Incorporate the Starter: Gently stir the yogurt mixture back into the cooled milk. Ensure it’s well combined.
Step 3: Incubate the Yogurt
Transfer to a Container: Pour the milk and yogurt mixture into a clean glass jar or container with a lid.
Keep Warm: To culture the yogurt, it needs to stay warm (around 110°F). You can use:
An oven with the light on (no heat).
A yogurt maker.
A warm spot in your kitchen.
Incubation Time: Let the yogurt sit undisturbed for 6 to 12 hours. The longer it sits, the tangier it will become.
Step 4: Check the Yogurt
Consistency and Flavor: After the incubation period, check the yogurt. It should be thickened and have a tangy flavor. If it hasn’t thickened, let it sit a little longer.
Step 5: Chill and Store
Refrigerate: Once the yogurt is ready, cover it with a lid and refrigerate for at least 2 hours to set further.
Store: Homemade yogurt can be stored in the refrigerator for up to 2 weeks.
Step 6: Serve
Flavoring: When serving, you can enjoy it plain or add sweeteners, vanilla extract, or fresh fruits for extra flavor.
Uses: Use your homemade yogurt for breakfast with granola, in smoothies, or as a healthy snack.
Tips:
- Use high-quality milk for the best flavor and texture.
- Save a bit of your homemade yogurt to use as a starter for your next batch.
- Experiment with different flavorings and toppings to find your favorite combinations
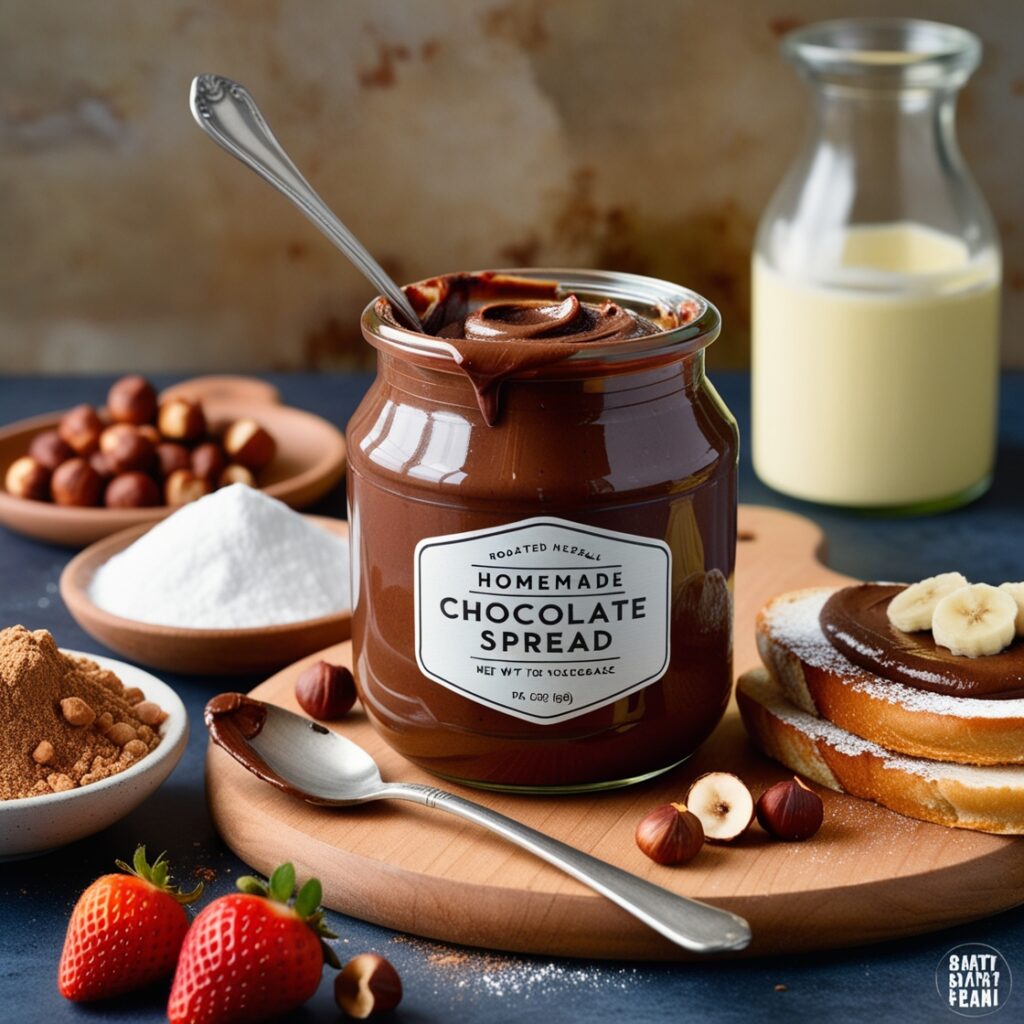
Chocolate Spread
Kitchen Staples: Homemade Chocolate Spread for Breads and Desserts
1 cup hazelnuts
1 cup powdered sugar
1/4 cup unsweetened cocoa powder
1/2 teaspoon vanilla extract
1/4 teaspoon salt
2 to 4 tablespoons vegetable oil (such as canola or coconut)
Optional: 1/4 cup milk or non-dairy milk for creaminess
Instructions:
Step 1: Prepare the Hazelnuts
Roast the Hazelnuts: Preheat your oven to 350°F (175°C). Spread the hazelnuts on a baking sheet in a single layer.
Bake: Roast for about 10-12 minutes or until they are golden brown. Keep an eye on them to prevent burning.
Cool and Skin: Remove the hazelnuts from the oven and let them cool slightly. Once cool enough to handle, rub the hazelnuts in a clean kitchen towel to remove as much of the skin as possible. It’s okay if some skins remain.
Step 2: Blend the Hazelnuts
Process: Place the cooled hazelnuts in a food processor. Blend until they become a smooth hazelnut butter, scraping down the sides as necessary. This can take 5-10 minutes, depending on your processor.
Add Ingredients: Once you have a smooth hazelnut butter, add the powdered sugar, cocoa powder, vanilla extract, and salt. Blend again until well combined.
Step 3: Adjust Consistency
Add Oil: With the food processor running, slowly add vegetable oil one tablespoon at a time until you reach your desired consistency. If you prefer a creamier spread, you can also add milk or non-dairy milk at this stage, blending until smooth.
Step 4: Taste and Adjust
Taste Test: Taste your chocolate spread and adjust sweetness or chocolate flavor by adding more powdered sugar or cocoa powder as desired. Blend again to combine.
Step 5: Store the Chocolate Spread
Transfer: Once you’re satisfied with the flavor and consistency, transfer the chocolate spread to a clean glass jar with a lid.
Refrigerate: Store in the refrigerator for up to 2 weeks. The spread may thicken when chilled; simply let it sit at room temperature for a few minutes before using.
Step 6: Serve
Enjoy: Use your homemade chocolate spread on breads, pancakes, waffles, or as a dip for fruits. It can also be used in desserts like cakes or brownies.
Tips:
- Flavor Variations: Try adding a pinch of cinnamon or a splash of almond extract for a unique twist.
- Nut-Free Version: Substitute hazelnuts with sunflower seeds to make a nut-free spread.
- Storage: Ensure your jar is airtight to maintain freshness.
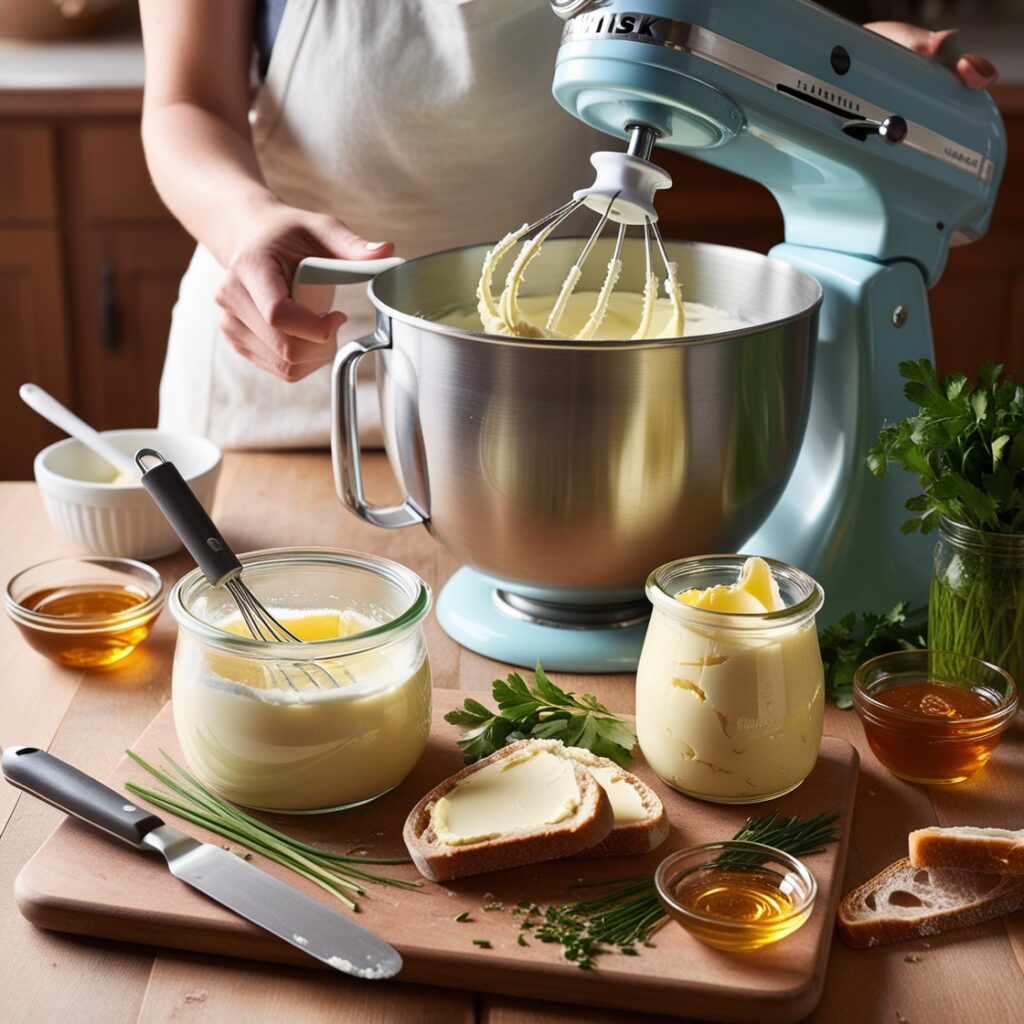
Butter
Kitchen Staples: Homemade Butter for Spreading on Bread and Cooking
1 pint heavy cream (cold)
1/4 teaspoon salt (adjust to taste)
Optional: additional flavorings (e.g., herbs, garlic, honey).
Instructions:
Step 1: Whip the Cream
Pour the Cream: In a large mixing bowl or a stand mixer, pour in the cold heavy cream.
Start Mixing: Begin whipping the cream on medium speed. If using a stand mixer, use the whisk attachment.
Watch for Stages:
First, the cream will turn into whipped cream (soft peaks).
Continue whipping past this stage until the cream thickens further and starts to separate. You will see buttermilk forming and the butter clumping together. This process takes about 8-10 minutes.
Step 2: Separate Butter from Buttermilk
Drain the Buttermilk: Once you have a solid mass of butter, pour off the liquid buttermilk into a separate bowl. You can reserve this for baking or cooking.
Rinse the Butter: Place the butter in a bowl and rinse it under cold water. This helps remove any remaining buttermilk, which can spoil the butter. Use your hands to knead the butter while rinsing until the water runs clear.
Step 3: Add Salt and Flavor (Optional)
Mix in Salt: If desired, add 1/4 teaspoon of salt to the butter. You can adjust the amount based on your taste preference.
Flavor Variations: For a herbed butter, mix in chopped fresh herbs like chives or parsley. For a sweet version, add honey or cinnamon.
Step 4: Shape and Store
Shape the Butter: You can shape the butter into a log by rolling it in parchment paper or pressing it into a container.
Refrigerate: Place the shaped butter in the refrigerator. It will firm up as it chills.
Store: Homemade butter can be kept in the refrigerator for up to 2 weeks or frozen for up to 6 months. Use airtight containers or wrap it well to prevent absorption of other flavors.
Step 5: Enjoy
Tips:
- Use your homemade butter for spreading on bread, adding to recipes, or melting over vegetables. It’s a versatile kitchen staple that enhances any dish!
- Choose Quality Cream: The quality of the heavy cream affects the flavor of your butter. Use fresh, high-quality cream for the best results.
Experiment with Flavors: Feel free to get creative with different flavorings to customize your butter to your taste
Honey
Kitchen Staples: Homemade Honey and Sweet Alternatives for Natural Sweetening

Maple Syrup (1 cup) – A natural sweetener with a distinct flavor.
Agave Nectar (1 cup) – A mild syrup derived from the agave plant.
Coconut Sugar (1 cup) – A granulated sweetener made from coconut palm sap.
Date Syrup (1 cup) – A thick syrup made from blended dates, offering a rich flavor.
Brown Rice Syrup (1 cup) – A sweetener made from cooked brown rice, less sweet than honey.
Molasses (1 cup) – A byproduct of sugar extraction, offering a strong flavor.
Stevia (to taste) – A natural sweetener derived from the stevia plant, much sweeter than sugar.
Fruit Purees (e.g., apple or banana) (1 cup) – For natural sweetness with added nutrition.
Instructions:
Step 1: Choose Your Sweetener
Decide which honey alternative you want to make or use. Each option has unique flavors and sweetness levels.
Step 2: Prepare Your Sweetener
1. Maple Syrup:
Pour pure maple sap into a saucepan.
Heat it over medium heat until it thickens, about 15-20 minutes.
Stir occasionally to prevent burning. Allow it to cool before storing.
2. Agave Nectar:
Simply purchase agave nectar from a store; no preparation needed.
If you want to make a thicker syrup, combine agave with a bit of water in a saucepan and simmer until it reaches the desired consistency.
3. Coconut Sugar:
Combine equal parts coconut sugar and water in a saucepan.
Heat over low heat, stirring until the sugar dissolves.
Allow it to cool, and store it in a jar.
4. Date Syrup:
Soak 1 cup of pitted dates in warm water for about 10-15 minutes.
Blend the soaked dates with a bit of the soaking water until smooth.
Adjust the thickness by adding more water if needed.
5. Brown Rice Syrup:
Cook 1 cup of brown rice until soft.
Blend the rice with 1 cup of water until smooth.
Strain the mixture through a cheesecloth to extract the syrup.
6. Molasses:
Purchase unsulfured molasses from a store; it’s ready to use.
Mix it with other sweeteners if desired for a different flavor.
7. Stevia:
Use powdered or liquid stevia based on preference.
Start with a small amount, as it is much sweeter than honey. Adjust to taste.
8. Fruit Purees:
Blend fresh or cooked fruits like apples or bananas until smooth.
Use as a sweetener in recipes where the flavor complements the dish.
Step 3: Store Your Honey Alternative
Pour your homemade sweetener into clean, airtight containers.
Label and date each container.
Store in the refrigerator or a cool, dark place depending on the sweetener type. Most can last several weeks to months.
Step 4: Enjoy!
Use your homemade honey alternatives to sweeten teas, baked goods, yogurt, or drizzled over pancakes. Each alternative brings its unique flavor profile, allowing you to customize your sweetening experience!
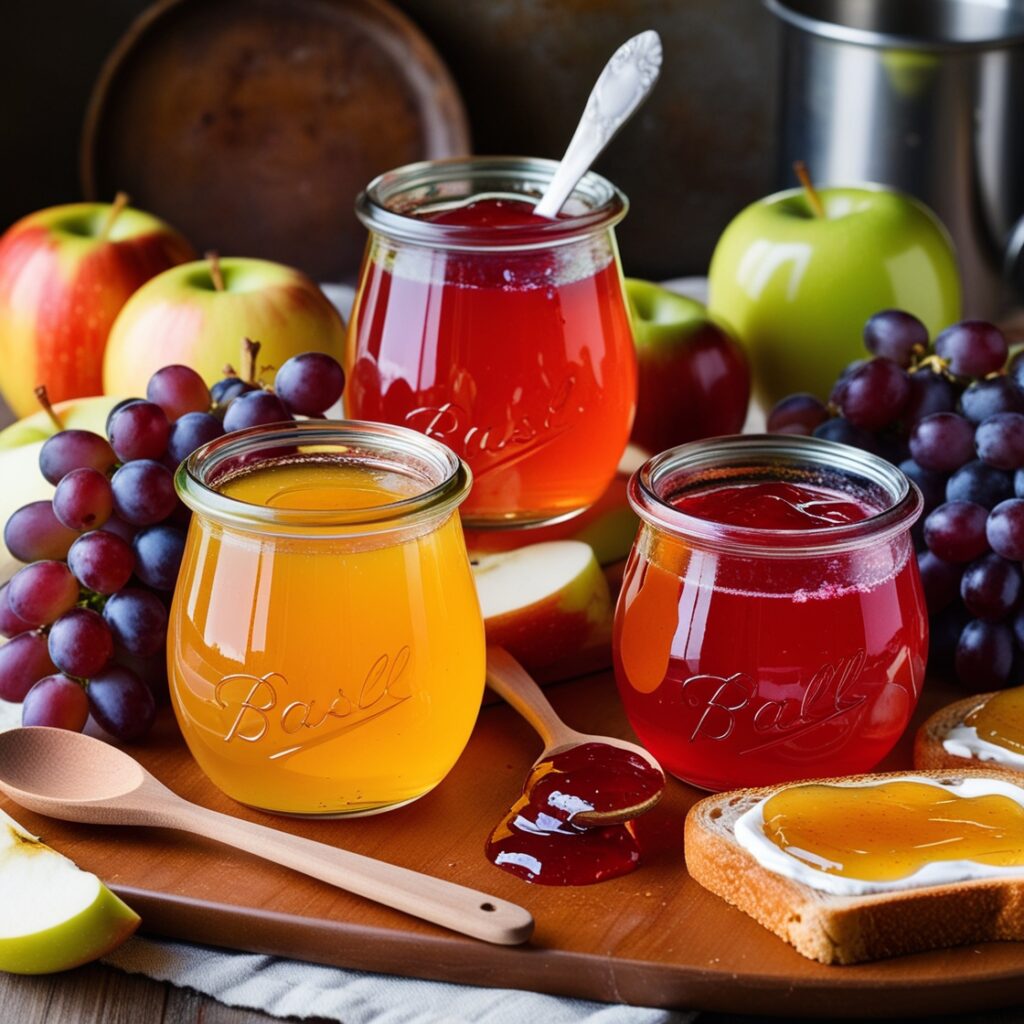
Homemade Jellies
Kitchen Staples: Fruit Jellies from Grape and Apple for Delicious Spreads
Fruit Juice:
4 cups of juice (grape, apple, or your choice)
Sugar:
1 ½ cups of granulated sugar (adjust based on sweetness preference)
Pectin:
1 package (1.75 oz) of fruit pectin (like Sure-Jell or Ball)
Lemon Juice:
¼ cup (freshly squeezed for best flavor)
Water:
1 cup (for dissolving pectin)
Instructions:
Step 1: Prepare the Ingredients
Select Your Fruit: Choose fresh, ripe fruits if making juice from scratch. For grape jelly, Concord grapes work well. For apple jelly, use tart apples for a balanced flavor.
Extract Juice: If using fresh fruits, wash them thoroughly. For grapes, crush the fruit and strain through a cheesecloth to extract the juice. For apples, chop and cook them in a bit of water until soft, then strain the mixture.
Step 2: Measure Ingredients
Measure out 4 cups of fruit juice;
1 ½ cups of sugar;
Measure out 1 package of fruit pectin;
¼ cup of lemon juice.
Step 3: Dissolve the Pectin
In a medium saucepan, combine 1 cup of water and the fruit pectin. Stir well and bring to a boil over medium heat. Boil for 1-2 minutes until the pectin is completely dissolved.
Step 4: Combine Ingredients
In a large pot, combine the fruit juice, dissolved pectin, and lemon juice. Stir well to mix all the ingredients.
Add the granulated sugar to the mixture. Stir constantly until the sugar is fully dissolved.
Step 5: Bring to a Boil
Place the pot over high heat and bring the mixture to a rolling boil. Make sure the mixture is boiling vigorously and cannot be stirred down. This is crucial for proper jelling.
Boil for 1-2 minutes, then remove from heat.
Step 6: Test for Jelling
To test if the jelly is ready, place a spoonful on a cold plate and let it sit for a minute. Run your finger through it; if it holds its shape, it’s ready. If not, boil for another minute and test again.
Step 7: Prepare Jars
Sterilize your jars and lids by boiling them in water for 10 minutes or running them through a dishwasher cycle. Keep them warm until ready to fill.
Step 8: Fill the Jars
Pour the hot jelly mixture into the prepared jars, leaving about ¼ inch of headspace at the top. Wipe the rims with a clean cloth to remove any residue.
Step 9: Seal the Jars
Place the sterilized lids on the jars and screw on the metal bands until they are fingertip-tight.
Step 10: Process the Jars
If you want shelf-stable jellies, process the jars in a boiling water bath for 5-10 minutes. Ensure the water covers the jars by at least an inch.
Remove jars from the water bath and let them cool completely on a clean towel or cooling rack.
Step 11: Store and Enjoy
Once cooled, check the seals by pressing the center of each lid; if it doesn’t pop back, the jar is sealed. Store the jellies in a cool, dark place. Enjoy your homemade jellies as spreads on toast, in desserts, or as a sweet addition to recipes!
Cottage Cheese
Kitchen Staples: Homemade Cottage Cheese for Meals and Snacks
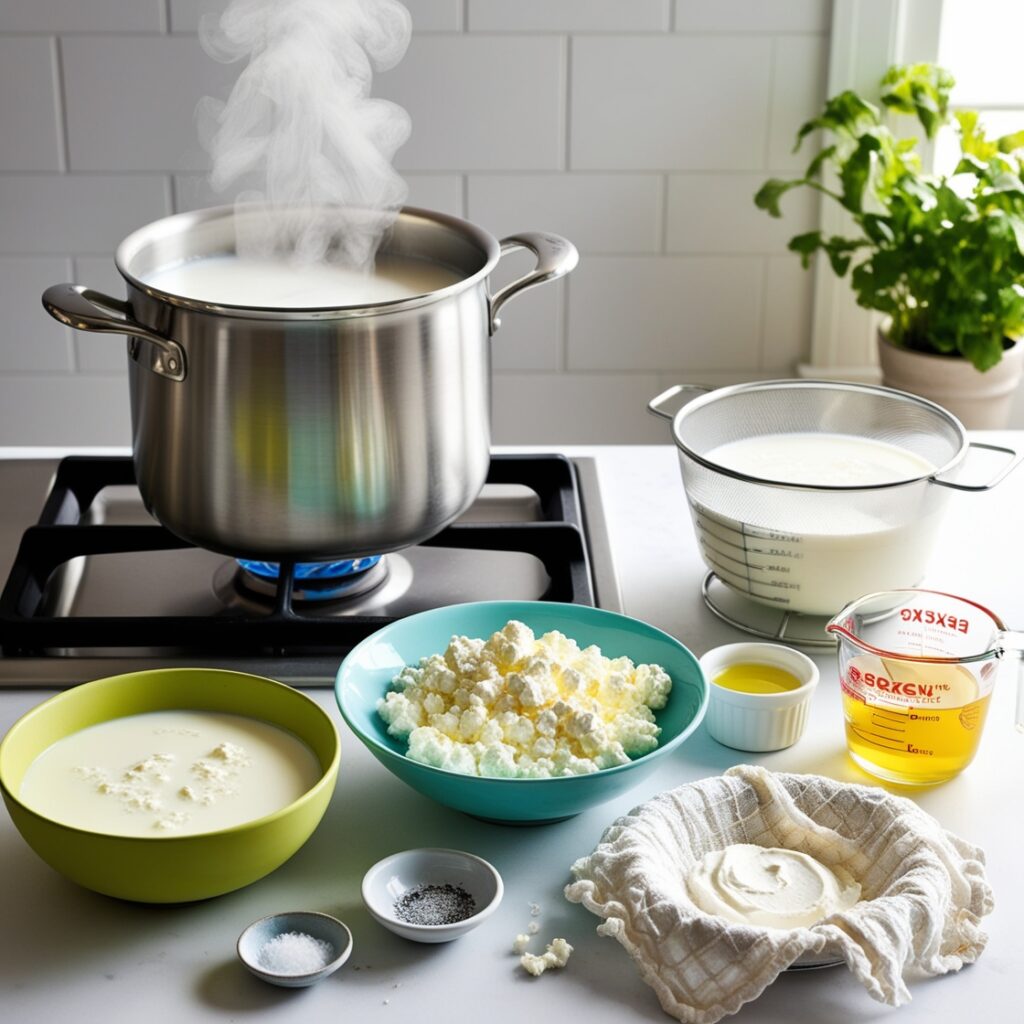
Milk: 1 gallon (whole milk works best)
Vinegar or Lemon Juice: 1/3 cup (white vinegar or fresh lemon juice)
Salt: 1 teaspoon (adjust to taste)
Optional: Cream or yogurt (for creamier texture)
Instructions:
Step 1: Heat the Milk
Pour the milk into a large pot and heat it over medium heat.
Stir occasionally to prevent the milk from scorching.
Heat the milk until it reaches about 190°F (88°C). You will see steam rising, and small bubbles may form around the edges.
Step 2: Add Acid
Once the milk is hot, remove it from the heat.
Slowly stir in the vinegar or lemon juice. This will cause the milk to curdle, separating into curds and whey.
Let the mixture sit for about 5-10 minutes. You should see clumps of curds forming.
Step 3: Drain the Curds
Line a colander with cheesecloth or a clean kitchen towel.
Carefully pour the curdled milk into the colander to separate the curds from the whey.
Let it drain for a few minutes to remove excess liquid. You can gently press the curds with a spatula to speed up the draining process.
Step 4: Rinse the Curds
Rinse the curds under cold water while still in the colander. This helps remove any residual acidity from the vinegar or lemon juice.
Continue rinsing until the water runs clear.
Step 5: Add Salt
Transfer the drained curds to a mixing bowl.
Sprinkle the salt over the curds and mix gently to combine. Adjust the salt to your taste.
Step 6: Optional Creaminess
For a creamier texture, you can mix in a couple of tablespoons of cream or yogurt at this stage. This step is optional, depending on your preference.
Step 7: Store
Transfer the cottage cheese to an airtight container.
Store it in the refrigerator for up to one week.
Serving Suggestions:
Enjoy your homemade cottage cheese as a snack, mixed with fruits or honey, or as an ingredient in salads and pasta dishes. It’s a versatile addition to many meals!
Nut Butters
Kitchen Staples: Homemade Nut Butters for Delicious Sandwiches and Snacks
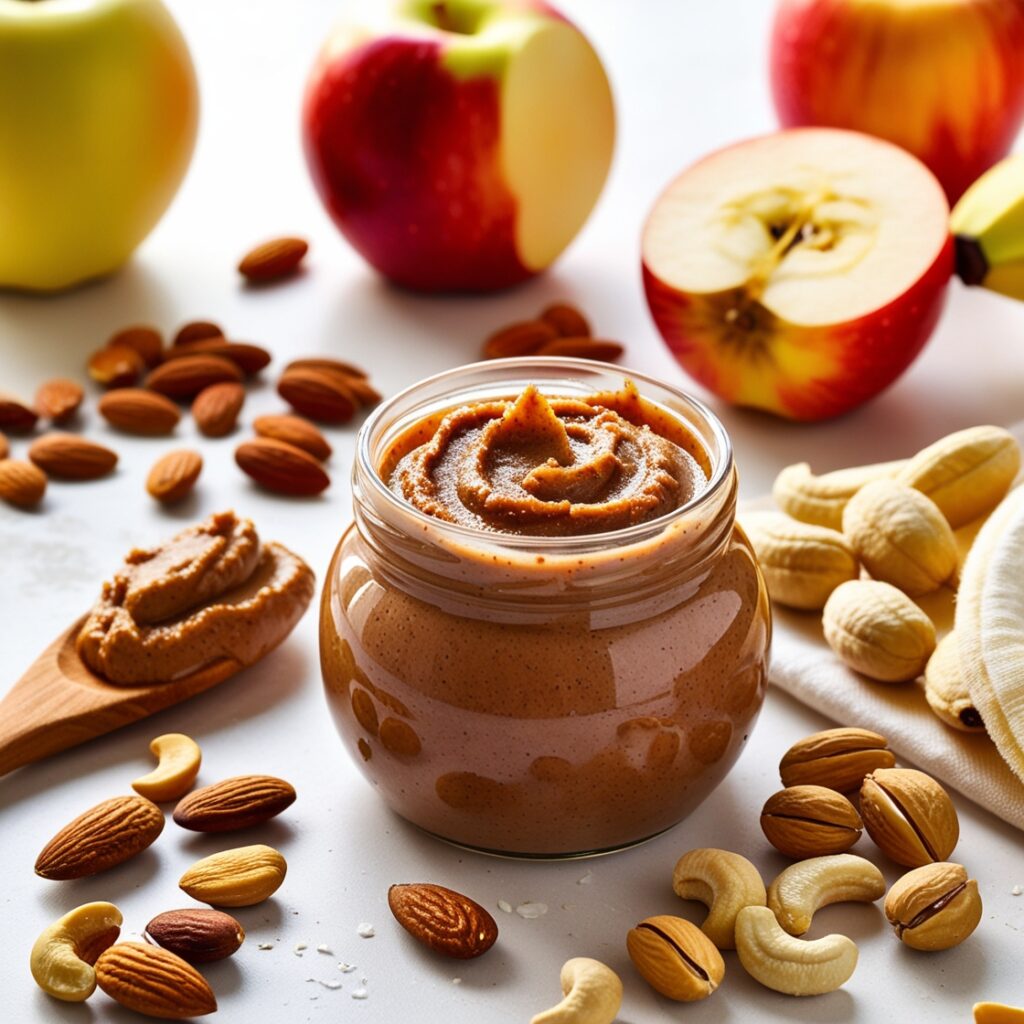
Nuts: 2 cups (choose from almonds, cashews, or any nut of your choice)
Salt: 1/4 teaspoon (adjust to taste)
Sweetener (optional): 1-2 tablespoons of honey or maple syrup (for added sweetness)
Oil (optional): 1 tablespoon of neutral oil (like canola or coconut) for creaminess
Instructions:
Step 1: Prepare the Nuts
Preheat your oven to 350°F (175°C).
Spread the nuts evenly on a baking sheet. If you prefer raw nut butter, skip this roasting step.
Roast the nuts in the oven for about 10-12 minutes, stirring halfway through to ensure even roasting. This enhances their flavor.
Allow the nuts to cool slightly after roasting.
Step 2: Blend the Nuts
Transfer the roasted (or raw) nuts to a food processor.
Blend on high speed for about 5-10 minutes. Initially, the nuts will turn into a powder. Keep blending until the oil is released, and a smooth paste forms. You may need to stop and scrape down the sides occasionally.
Step 3: Add Ingredients
Once the nut butter reaches a creamy consistency, add salt and any optional sweeteners or oil.
Blend again until fully incorporated. Taste and adjust the salt or sweetness according to your preference.
Step 4: Store the Nut Butter
Transfer the nut butter to an airtight container. Glass jars work well for storage.
Store it in the refrigerator for up to two weeks. If you added oil, it may last a little longer.
Serving Suggestions:
- Spread on whole-grain bread for sandwiches.
- Use as a dip for fruits like apples or bananas.
- Add to smoothies or oatmeal for a protein boost.
- Enjoy with crackers or as a topping for yogurt.
- This homemade nut butter is a delicious kitchen staple that enhances meals and snacks with its creamy texture and rich flavor!
Custards
Kitchen Staples: Homemade Vanilla or Chocolate Custards for Delicious Desserts

For Vanilla Custard:
2 cups whole milk
1/2 cup granulated sugar
3 large egg yolks
2 tablespoons cornstarch
1 teaspoon vanilla extract
A pinch of salt
For Chocolate Custard:
2 cups whole milk
1/2 cup granulated sugar
3 large egg yolks
2 tablespoons cornstarch
1/2 cup unsweetened cocoa powder
1 teaspoon vanilla extract
A pinch of salt
Instructions
Step 1: Prepare the Base
Heat the Milk:
In a saucepan, combine the whole milk and half of the sugar (1/4 cup) for both recipes. Heat over medium heat until it begins to steam, but do not boil. Stir occasionally to prevent sticking.
Step 2: Mix the Egg Yolks
Combine Ingredients:
In a mixing bowl, whisk together the egg yolks, remaining sugar (1/4 cup), cornstarch, and a pinch of salt until well combined. For the chocolate custard, add cocoa powder to this mixture.
Step 3: Temper the Egg Yolks
Temper the Mixture:
Once the milk is steaming, gradually pour a small amount of the hot milk into the egg mixture while whisking constantly. This helps to temper the eggs and prevents them from scrambling.
Slowly add the rest of the hot milk while continuing to whisk.
Step 4: Cook the Custard
Thicken the Custard:
Pour the mixture back into the saucepan. Cook over medium heat, stirring constantly with a wooden spoon or whisk until the custard thickens and coats the back of the spoon. This may take about 5-7 minutes.
For the chocolate custard, ensure that the cocoa powder is fully dissolved and the mixture is smooth.
Step 5: Add Flavoring
Add Vanilla:
Once thickened, remove the saucepan from the heat. Stir in the vanilla extract. For chocolate custard, make sure the chocolate flavor is well incorporated.
Step 6: Strain the Custard
Strain for Smoothness:
If desired, strain the custard through a fine-mesh sieve into a clean bowl to remove any lumps. This step ensures a silky-smooth texture.
Step 7: Cool and Serve
Cool Down:
Allow the custard to cool at room temperature for a few minutes before transferring it to serving dishes or ramekins.
Cover with plastic wrap (pressing it directly on the surface to prevent a skin from forming) and refrigerate for at least 2-4 hours until fully chilled.
Step 8: Enjoy!
Serve:
Once chilled, your homemade vanilla or chocolate custard is ready to serve. Enjoy it plain, or garnish with whipped cream, fresh fruits, or chocolate shavings for an extra touch.
Tips:
- For an even richer flavor, consider adding a splash of heavy cream to the milk.
- You can also infuse the milk with flavors like orange zest or mint leaves while heating, then strain before adding to the egg mixture for unique variations.
- Enjoy your delightful homemade custards!
Pickles
Kitchen Staples: Crunchy and Flavorful Homemade Pickles
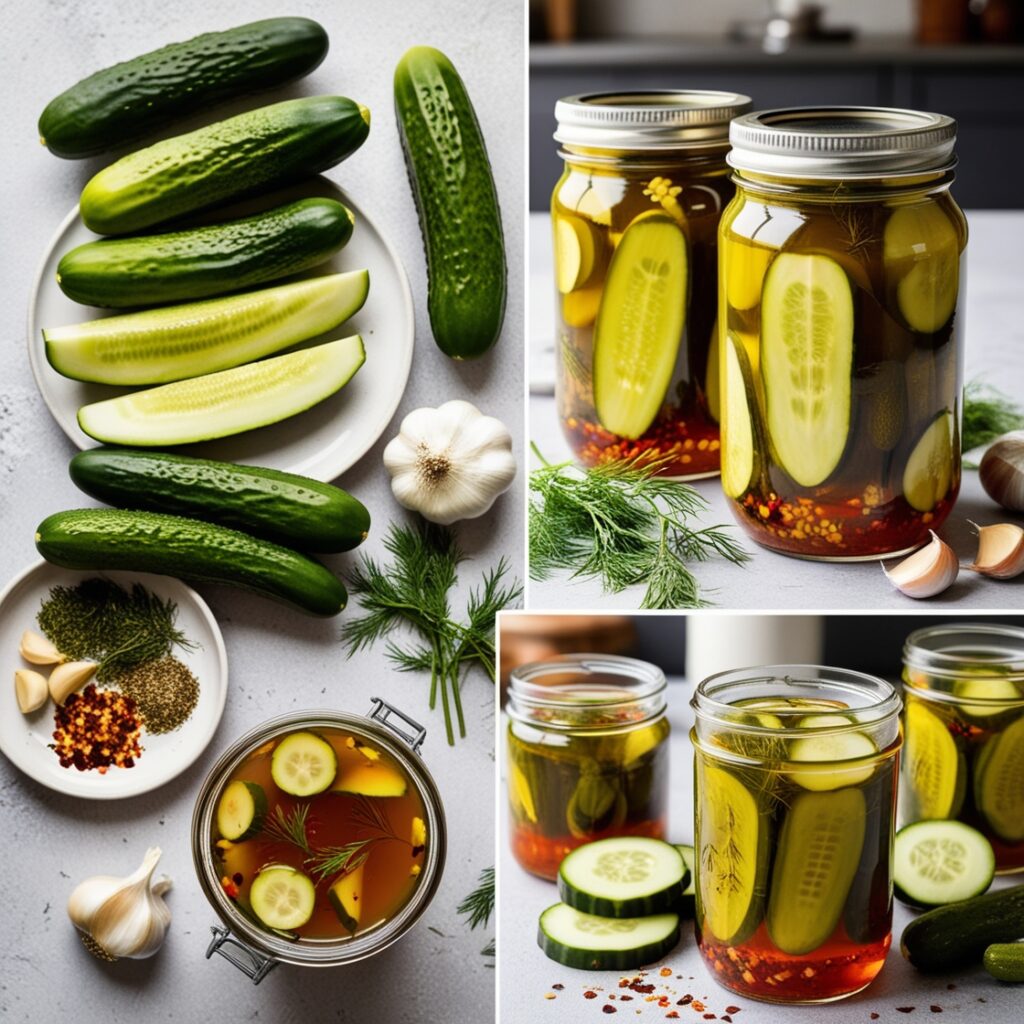
For the Brine:
2 cups water
1 cup white vinegar (or apple cider vinegar)
2 tablespoons kosher salt
2 tablespoons granulated sugar (optional for sweetness)
1 tablespoon pickling spice (or your preferred spices, e.g., dill, mustard seeds, garlic)
For the Pickles:
4-6 small cucumbers (Kirby cucumbers work well)
2-3 cloves garlic, peeled and crushed
Fresh dill sprigs (optional)
Red pepper flakes (optional, for heat)
Instructions
Step 1: Prepare the Cucumbers
Wash the cucumbers thoroughly under cold water.
Trim the ends off the cucumbers to remove any bitterness.
You can leave them whole, slice them into spears, or cut them into rounds, depending on your preference.
Step 2: Make the Brine
In a medium saucepan, combine the water, white vinegar, kosher salt, and granulated sugar (if using).
Add the pickling spice to the mixture.
Heat the mixture over medium heat, stirring occasionally until the salt and sugar are fully dissolved.
Once dissolved, remove the brine from heat and let it cool to room temperature.
Step 3: Prepare the Jars
Sterilize glass jars (pint or quart-sized) by placing them in boiling water for 10 minutes or running them through the dishwasher.
Allow them to cool before filling.
Step 4: Pack the Jars
In each jar, place a few garlic cloves and a sprig of fresh dill (if using).
Pack the prepared cucumbers into the jars tightly, leaving about half an inch of space at the top.
If you like heat, sprinkle some red pepper flakes over the cucumbers.
Step 5: Add the Brine
Pour the cooled brine over the packed cucumbers, ensuring they are completely submerged. Leave a little space at the top to allow for expansion.
You can use a clean utensil to press the cucumbers down if necessary.
Step 6: Seal and Store
Seal the jars tightly with lids.
Let the pickles cool to room temperature before placing them in the refrigerator.
Step 7: Wait and Enjoy
Allow the pickles to sit in the refrigerator for at least 24 hours before tasting for the best flavor.
The pickles will continue to develop flavor as they sit and can be enjoyed for several weeks.
Tips
- Experiment with different spices to create your own unique flavor profile.
- For a sweeter pickle, increase the sugar in the brine to your liking.
- These homemade pickles are perfect as snacks, sandwich toppings, or side dishes!
Fruit Preserves
Kitchen Staples: Homemade Fruit Preserves for Spreading on Bread and Enhancing Recipes
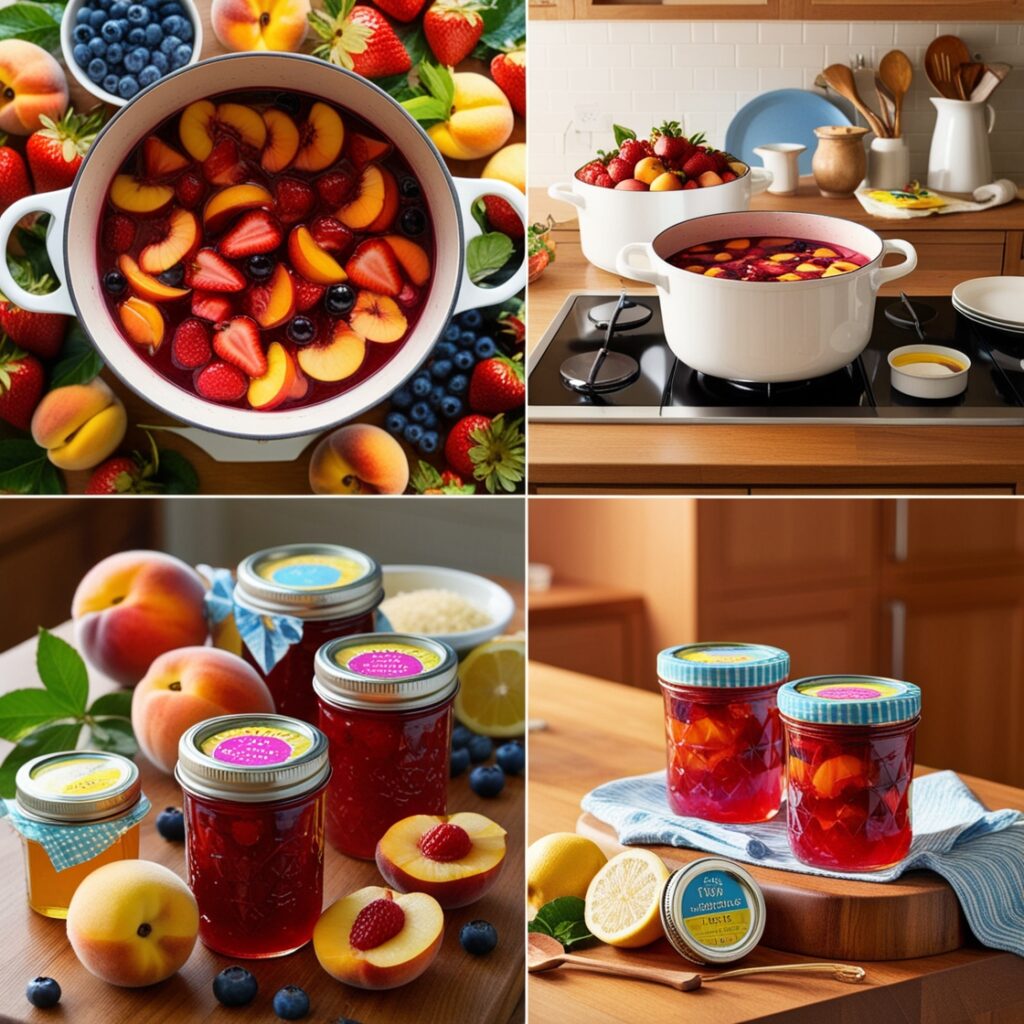
Fruit: 4 cups of fresh fruit (strawberries, peaches, blueberries, or your choice)
Sugar: 2 cups granulated sugar (adjust based on fruit sweetness)
Lemon Juice: 1/4 cup fresh lemon juice (about 2 lemons)
Pectin: 1 packet of fruit pectin (optional for thicker preserves)
Water: 1/4 cup (if using pectin)
Instructions:
Step 1: Prepare the Fruit
Wash the fruit thoroughly under cold water.
If using strawberries, hull and slice them. For peaches, peel and pit them, then chop into small pieces. Blueberries can be used whole.
Measure out 4 cups of prepared fruit.
Step 2: Combine Ingredients
In a large pot, combine the fruit and sugar. Stir to coat the fruit evenly.
Let the mixture sit for about 30 minutes to an hour. This helps the fruit release its juices.
Step 3: Add Lemon Juice
After the fruit has rested, add the lemon juice to the pot. The acidity helps preserve the fruit and enhances the flavor.
Step 4: Cook the Mixture
Place the pot over medium heat and stir occasionally until the sugar dissolves completely.
Bring the mixture to a boil, then reduce to a simmer. If using pectin, follow the instructions on the package for when to add it (usually after the mixture reaches a boil).
Step 5: Simmer the Preserves
Allow the fruit mixture to simmer for about 20-30 minutes, stirring frequently. The mixture should thicken and reduce in volume.
To test the consistency, place a small amount on a cold plate. If it holds its shape after a minute, it’s ready. If not, continue cooking for another 5-10 minutes and test again.
Step 6: Jar the Preserves
Sterilize jars and lids by placing them in boiling water for 10 minutes or running them through a dishwasher cycle.
Once the preserves have thickened, remove them from heat and let them cool slightly.
Pour the hot preserves into the sterilized jars, leaving about 1/4 inch of headspace at the top.
Step 7: Seal and Store
Wipe the rims of the jars with a clean cloth to remove any residue.
Place the sterilized lids on the jars and screw the bands on until they are fingertip-tight.
Allow the jars to cool to room temperature. Once cooled, store them in the refrigerator for immediate use or process them in a boiling water bath for longer shelf life.
Step 8: Enjoy
Your homemade fruit preserves can be used on toast, as a topping for desserts, or in various recipes. They will keep in the refrigerator for several weeks or longer if properly canned.
Tips
- Experiment with different fruits or combinations for unique flavors.
- Adjust the sugar based on the natural sweetness of the fruit used.
- For a thicker preserve, consider using more pectin or cooking it longer.
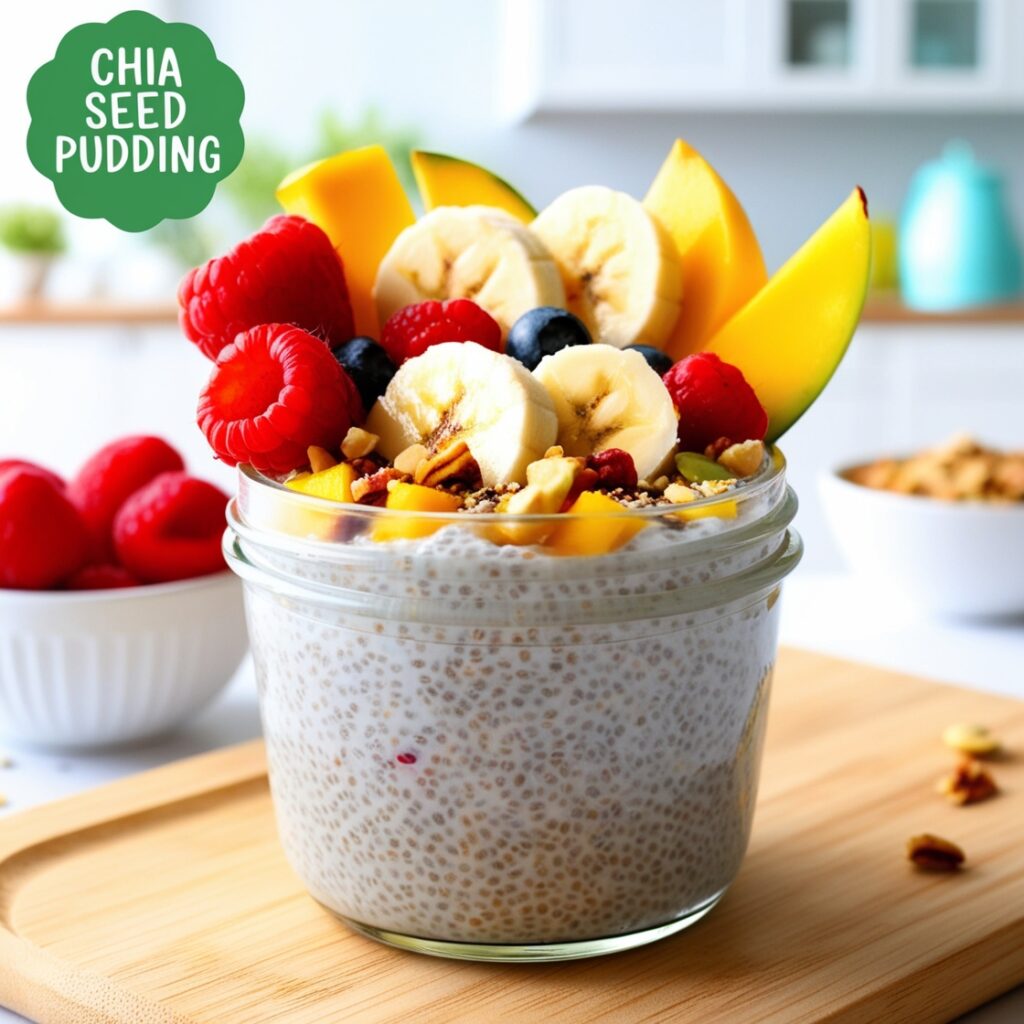
Chia Seed Pudding
Kitchen Staples: Nutritious Homemade Pudding for a Healthy Snack or Breakfast
1/2 cup chia seeds
2 cups milk (you can use dairy, almond, coconut, or any milk of your choice)
2 tablespoons sweetener (such as honey, maple syrup, or agave syrup, adjust to taste)
1 teaspoon vanilla extract (optional)
A pinch of salt
Toppings (such as fresh fruit, nuts, granola, or shredded coconut)
Instructions:
Step 1: Combine Ingredients
In a medium-sized mixing bowl, add 1/2 cup of chia seeds.
Pour in 2 cups of your chosen milk.
Add 2 tablespoons of sweetener (adjust according to your taste preference).
Stir in 1 teaspoon of vanilla extract and a pinch of salt for flavor.
Step 2: Mix Thoroughly
Whisk the mixture well to ensure the chia seeds are evenly distributed and not clumping together.
Allow the mixture to sit for about 5-10 minutes. This step allows the chia seeds to absorb some of the liquid.
Step 3: Stir Again
After the resting period, stir the mixture again to break up any clumps that may have formed.
At this point, you can adjust the sweetness if needed by adding more sweetener.
Step 4: Refrigerate
Cover the bowl with plastic wrap or transfer the mixture into a jar with a lid.
Refrigerate for at least 2-4 hours, or preferably overnight. This allows the chia seeds to expand and thicken the pudding.
Step 5: Serve
Once the pudding has set and reached a creamy consistency, give it a good stir.
Serve the chia seed pudding in bowls or jars.
Step 6: Add Toppings
Top your pudding with fresh fruits (like berries, banana slices, or mango), nuts, granola, or shredded coconut for added texture and flavor.
Step 7: Enjoy
Enjoy your nutritious chia seed pudding as a healthy snack or a satisfying breakfast!
Tips
- For a chocolate version, you can add 2 tablespoons of cocoa powder to the mixture.
- Experiment with different flavors by adding spices like cinnamon or nutmeg.
- Store any leftover pudding in the refrigerator for up to 5 days.
Fruits Compotes
Kitchen Staples: Homemade Fruit Compotes for Breakfast and Dessert Toppings

4 cups of fresh or frozen fruit (such as apples, pears, berries, peaches, or a mix)
1/4 cup of sugar (adjust based on the sweetness of the fruit)
1 tablespoon of lemon juice (for brightness)
1 teaspoon of vanilla extract (optional)
1/2 teaspoon of cinnamon (optional, for added warmth)
A pinch of salt
Instructions:
Step 1: Prepare the Fruit
If using fresh fruit, wash, peel (if necessary), and chop it into small, even pieces. For berries, simply wash them.
If using frozen fruit, allow it to thaw slightly, but you can also cook it directly from frozen.
Step 2: Combine Ingredients
In a medium saucepan, combine the chopped fruit, sugar, lemon juice, vanilla extract (if using), cinnamon (if using), and a pinch of salt. Stir gently to mix everything together.
Step 3: Cook the Mixture
Place the saucepan over medium heat. Cook the fruit mixture, stirring occasionally, until it begins to bubble.
Once bubbling, reduce the heat to low and let it simmer. Cook for about 10-15 minutes, or until the fruit has softened and the mixture has thickened. If using firmer fruits like apples or pears, you may need to simmer a bit longer.
Step 4: Adjust Consistency
If the compote is too thick, you can add a splash of water or fruit juice to reach your desired consistency. If it’s too thin, continue simmering until it thickens more.
Step 5: Cool and Store
Once the compote is done cooking, remove it from heat and let it cool slightly. You can serve it warm or allow it to cool completely before transferring it to a jar.
Store the compote in the refrigerator for up to one week.
Step 6: Serve
Serve the homemade fruit compote over yogurt, oatmeal, pancakes, waffles, or ice cream for breakfast or dessert. Enjoy your delicious and versatile fruit topping!
Tips:
- Feel free to mix and match fruits based on your preference or what’s in season.
- For an extra flavor boost, consider adding a splash of orange juice or a hint of ginger.
- This compote can also be blended for a smoother texture if desired.
Herb Blends
Kitchen Staples: Homemade Herb Blends for Seasoning and Flavoring
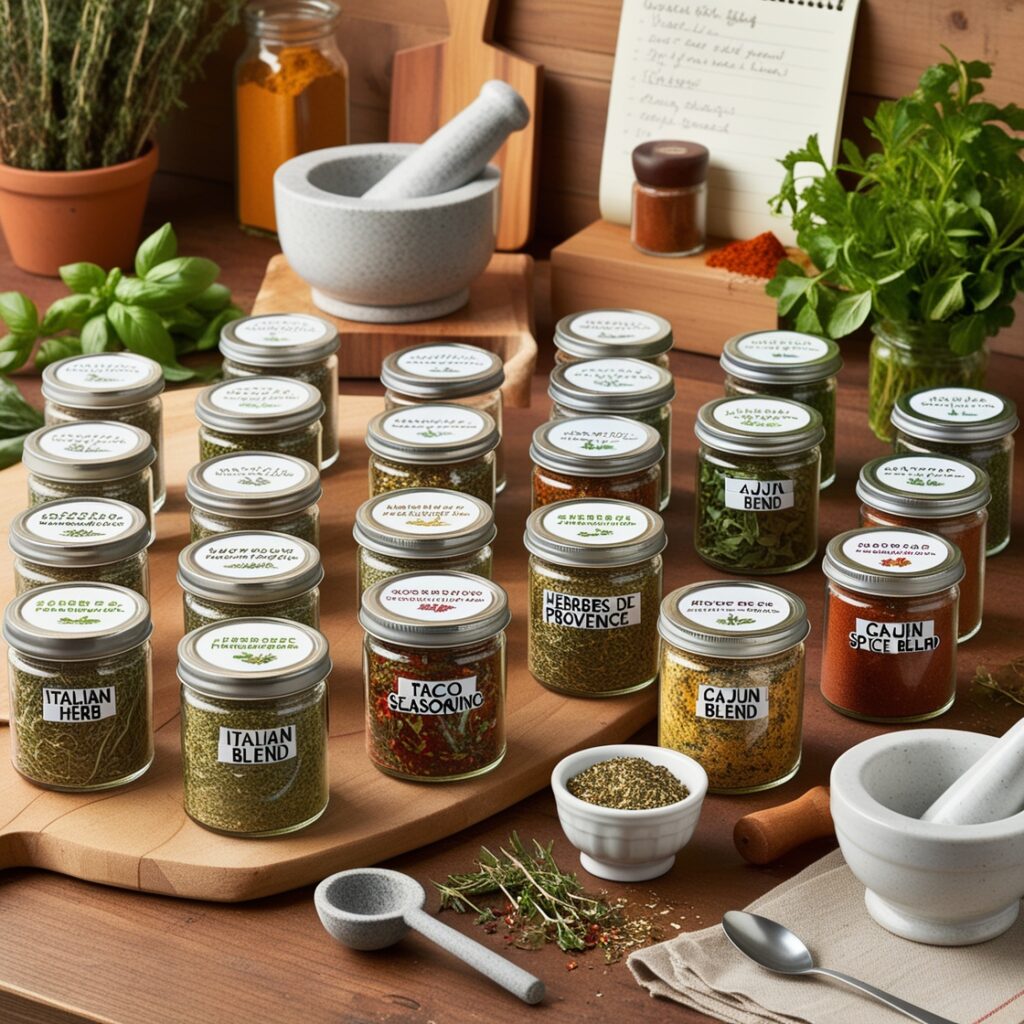
Italian Herb Blend:
2 tablespoons dried basil
2 tablespoons dried oregano
1 tablespoon dried thyme
1 tablespoon dried rosemary
1 tablespoon dried parsley
1 tablespoon dried marjoram
1 teaspoon garlic powder (optional)
1/2 teaspoon crushed red pepper flakes (optional, for heat)
Taco Seasoning Blend:
2 tablespoons chili powder
1 tablespoon cumin
1 teaspoon paprika (preferably smoked for added depth)
1 teaspoon garlic powder
1 teaspoon onion powder
1/2 teaspoon dried oregano
1/2 teaspoon cayenne pepper (optional for spiciness)
1/2 teaspoon black pepper
1 teaspoon salt
Herbes de Provence Blend:
2 tablespoons dried thyme
2 tablespoons dried rosemary
1 tablespoon dried marjoram
1 tablespoon dried oregano
1 tablespoon dried lavender flowers (optional but traditional in Herbes de Provence)
1 teaspoon dried tarragon
1 teaspoon dried fennel seeds
Cajun Spice Blend:
1 tablespoon paprika
1 tablespoon garlic powder
1 tablespoon onion powder
2 teaspoons dried oregano
2 teaspoons dried thyme
1 teaspoon cayenne pepper
1 teaspoon black pepper
1 teaspoon salt
Italian Garlic Blend:
2 tablespoons dried parsley
1 tablespoon garlic powder
1 tablespoon dried oregano
1 tablespoon dried basil
1 teaspoon black pepper
1 teaspoon crushed red pepper flakes (optional for heat)
Instructions:
1. Measure Ingredients:
Gather all the dried herbs and spices you’ll need for each blend. It’s best to use high-quality dried herbs to ensure maximum flavor.
If some herbs are in larger pieces (e.g., rosemary or fennel seeds), you can grind them in a mortar and pestle or spice grinder to create a more uniform texture.
2. Mix the Blends:
In a small mixing bowl, combine the specified amounts of herbs and spices for the chosen blend.
Stir the herbs and spices well to ensure they are evenly mixed.
3. Store the Herb Blends:
Once mixed, transfer the herb blend into an airtight container, preferably a small glass jar or spice container with a tightly fitting lid.
Label the jar with the name of the blend and the date you made it. These blends can be stored for 6 months to 1 year in a cool, dark place.
4. Use the Blends:
Italian Herb Blend: Perfect for seasoning pasta sauces, pizzas, roasted vegetables, or grilled meats.
Taco Seasoning Blend: Use for tacos, fajitas, or as a marinade for chicken or beef.
Herbes de Provence Blend: Excellent for seasoning meats, fish, vegetables, or even as a flavor enhancer in soups and stews.
Cajun Spice Blend: A great option for spicing up grilled meats, seafood, or adding to gumbo and jambalaya.
Italian Garlic Blend: Use to season garlic bread, add to pasta sauces, or sprinkle over roasted vegetables for added flavor.
Tips
- Adjust the seasoning to your taste. If you prefer more heat, you can add more cayenne or red pepper flakes.
- For the best results, refresh your herb blends every 6 to 12 months, as dried herbs can lose their potency over time.
- Feel free to experiment and create your own unique blend based on your family’s taste preferences!
- This detailed recipe helps you create versatile homemade herb blends using kitchen staples to elevate your meals with ease.
Pita Bread
Kitchen Staples: Flavorful Homemade Herb Blends for Seasoning

3 cups all-purpose flour (plus extra for kneading)
1 tablespoon sugar
2 teaspoons instant yeast
1 teaspoon salt
1 cup warm water (about 110°F/43°C)
2 tablespoons olive oil
Optional: 1 tablespoon whole wheat flour (for added flavor and texture)
Instructions:
1. Prepare the Dough:
-In a large mixing bowl, combine the all-purpose flour, sugar, instant yeast, and salt. Stir to evenly distribute the ingredients.
-Make a well in the center of the flour mixture and add warm water and olive oil.
Using a wooden spoon or your hands, mix the ingredients until a shaggy dough forms.
2. Knead the Dough:
-Transfer the dough onto a lightly floured surface.
-Knead the dough for about 8–10 minutes, adding a bit more flour if necessary, until the dough becomes smooth, soft, and elastic. It should not be too sticky.
-To test if the dough is ready, poke it lightly with your finger. If it springs back, the dough is ready.
3. Let the Dough Rise:
-Shape the dough into a ball and place it in a lightly greased bowl, turning it once so that the dough is coated with oil.
-Cover the bowl with a damp kitchen towel or plastic wrap and let the dough rise in a warm place for about 1–1.5 hours, or until it has doubled in size.
4. Shape the Pitas:
-Once the dough has risen, gently punch it down to release the air.
-Divide the dough into 8 equal portions (or more if you want smaller pitas). Shape each portion into a ball.
-Using a rolling pin, roll each ball into a circle about 1/4 inch thick and 6–8 inches in diameter. –—Make sure the dough is evenly rolled to ensure puffing during baking.
5. Preheat the Oven:
-Preheat your oven to 475°F (245°C) and place a baking stone or an inverted baking sheet in the oven to heat up. This will help the pita bread puff up properly during baking.
6. Bake the Pitas:
-Carefully transfer the rolled-out pitas onto the preheated baking stone or sheet (you can bake 2–3 at a time, depending on the size).
-Bake for 3–5 minutes, or until the pitas puff up and start to develop light golden spots.
-If the pitas do not puff up completely, don’t worry—they will still be delicious and perfect for sandwiches and snacks.
7. Cool the Pitas:
-Remove the pitas from the oven and place them in a clean kitchen towel to keep them soft as they cool. This helps trap the steam, making them more pliable and easier to stuff.
Serving Suggestions:
- For Sandwiches: Cut the pita in half and gently open the pocket. Stuff with your favorite fillings, such as falafel, grilled chicken, or veggies.
- For Snacks: Serve the pita bread with dips like hummus, tzatziki, or baba ghanoush. You can also cut the pitas into wedges and toast them for crispy chips.
- Storage:
- Store any leftover pita bread in an airtight container or plastic bag. It can stay fresh at room temperature for 2–3 days or be frozen for up to 2 months. To reheat, wrap in foil and warm in the oven or toast lightly.
Tips:
- If you prefer a bit of whole grain texture, substitute 1/4 to 1/2 cup of all-purpose flour with whole wheat flour.
- You can also cook the pitas on the stovetop in a hot cast-iron skillet if you don’t want to use the oven. Cook for about 2–3 minutes on each side until puffed and golden.
- This homemade pita bread recipe is a fantastic kitchen staple, providing a healthier, fresher alternative to store-bought versions!
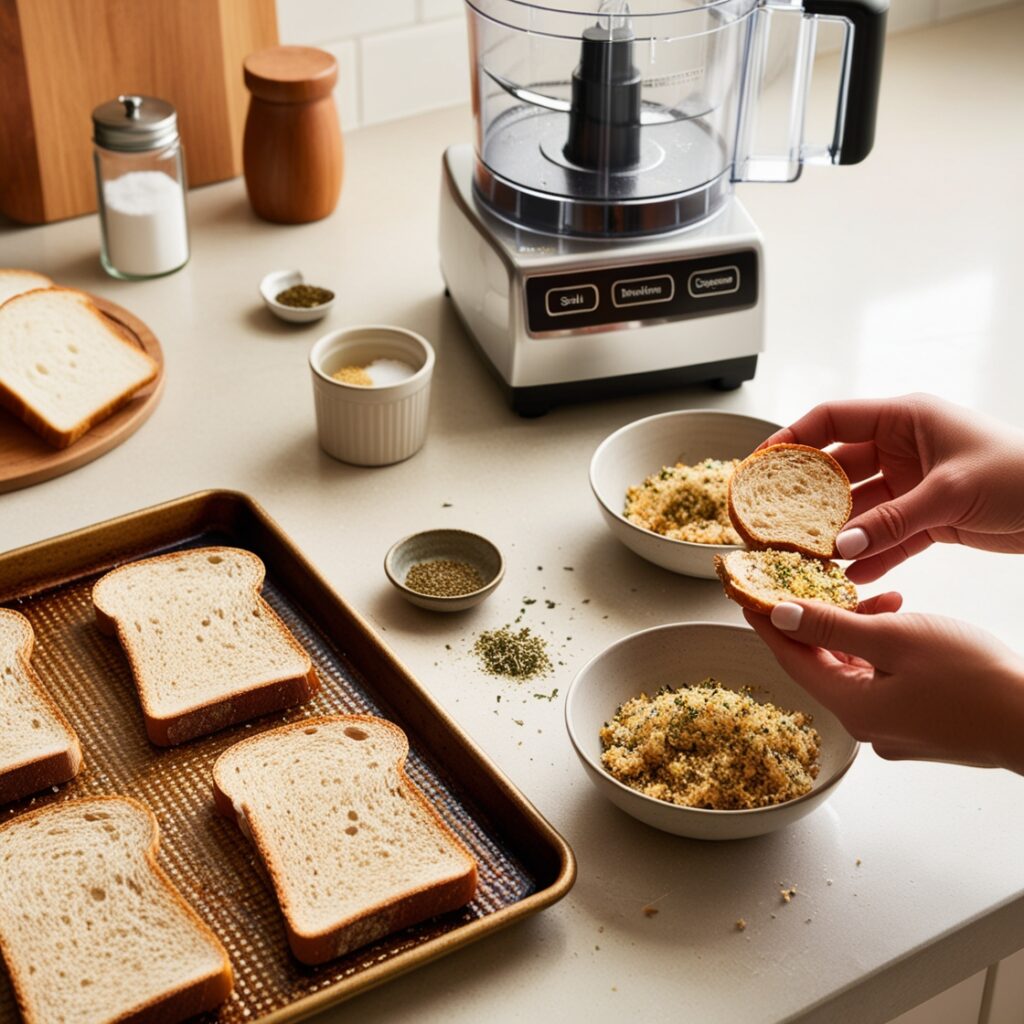
Bread Crumbs
Kitchen Staples: Homemade Breadcrumbs for Breading and Texture
4 slices of bread (any type: white, whole wheat, sourdough, etc.)
1/4 teaspoon salt (optional, for seasoning)
1/4 teaspoon garlic powder (optional, for added flavor)
1/4 teaspoon dried herbs (optional, such as oregano, thyme, or parsley)
Instructions:
1. Choose and Prepare the Bread:
Select the type of bread you’d like to use for the breadcrumbs. This can be any bread, whether fresh, stale, or leftover from a loaf.
For crisper breadcrumbs, it’s better to use slightly stale bread. If your bread is too soft or fresh, you can dry it out in the oven.
2. Dry the Bread:
Option 1: Oven Method
Preheat your oven to 300°F (150°C).
Slice the bread into manageable pieces (if not already in slices).
Place the bread slices on a baking sheet in a single layer.
Toast the bread in the oven for 10–15 minutes, flipping halfway through to ensure even drying. The bread should feel dry and crispy but not browned or burnt.
Option 2: Air-Drying
Alternatively, you can leave the bread slices out at room temperature for 24–48 hours until they dry out naturally. This method is slower but works if you have the time.
3. Blend the Bread:
Once the bread is dried, allow it to cool completely.
Break the bread into smaller chunks and place them into a food processor or blender.
Pulse the machine until the bread turns into fine or coarse crumbs, depending on your preference. If you prefer a finer consistency, pulse longer.
4. Season the Bread Crumbs (Optional):
After grinding the crumbs, you can add salt, garlic powder, or dried herbs for extra flavor. Add these seasonings directly into the food processor and pulse a few times to distribute them evenly.
5. Store the Bread Crumbs:
Transfer the prepared bread crumbs to an airtight container.
Store them at room temperature for up to 1 week, or refrigerate them for up to 1 month. For long-term storage, freeze the crumbs in a freezer-safe bag for up to 3 months.
Tips:
- Breading: Use them to coat chicken, fish, or vegetables before frying or baking.
- Topping: Sprinkle over casseroles or pasta dishes for added crunch.
- Binding: Incorporate them into meatballs, meatloaf, or veggie patties for texture.
- This recipe ensures you have a simple kitchen staple on hand whenever you need bread crumbs for breading or adding texture to your dishes!
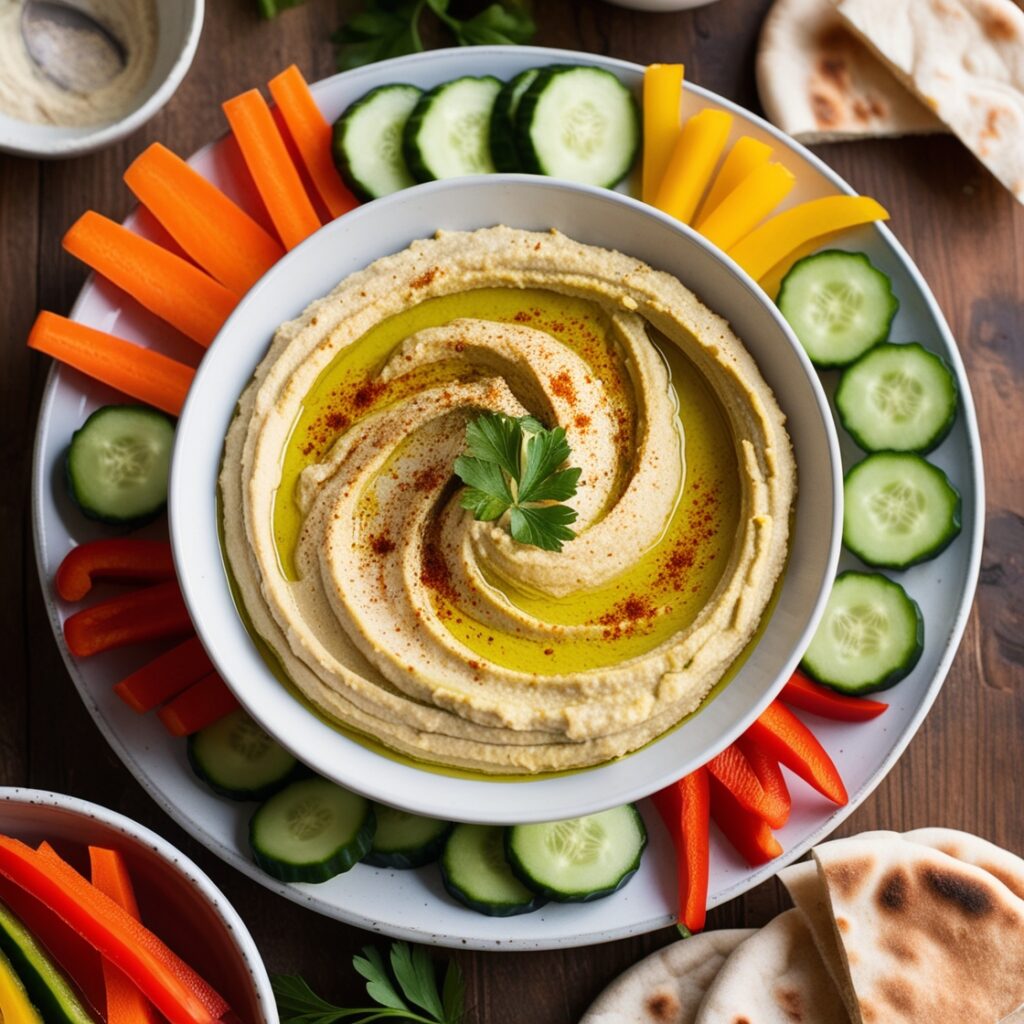
Hummus
Kitchen Staples: Homemade Hummus for Dipping and Spreading
1 can (15 oz) chickpeas (garbanzo beans), drained and rinsed
1/4 cup tahini (sesame seed paste)
2 tablespoons extra virgin olive oil
1-2 cloves garlic, minced
1/4 cup fresh lemon juice (about 1 medium lemon)
2-3 tablespoons water (adjust for desired consistency)
1/2 teaspoon ground cumin (optional, for added flavor)
Salt to taste (start with 1/2 teaspoon)
Pinch of paprika or cayenne pepper (optional, for garnish)
Additional olive oil (for drizzling on top before serving)
Instructions:
- Prepare the Chickpeas:
Drain and rinse the canned chickpeas thoroughly under cold water. If you want an extra smooth hummus, you can peel the chickpeas by gently rubbing them between your fingers to remove the outer skins, though this step is optional.
- Blend the Tahini and Lemon Juice:
In a food processor, add the tahini and fresh lemon juice. Process for 1-2 minutes until the mixture becomes smooth and creamy. This step helps to create a fluffy texture for the hummus.
- Add Garlic and Olive Oil:
Scrape the sides of the food processor and add the minced garlic, olive oil, and cumin (if using). Blend again for 30-45 seconds to incorporate the flavors.
- Add Chickpeas and Water:
Add the drained chickpeas to the food processor. Pulse the mixture several times to break down the chickpeas. While the machine is running, slowly add 2-3 tablespoons of water to reach your desired consistency. You may need to scrape down the sides occasionally to ensure everything is well blended.
Keep processing until the hummus is smooth and creamy, usually about 1-2 minutes. If it’s too thick, add a bit more water, one tablespoon at a time, until it reaches the right texture.
- Season with Salt:
Add salt to taste, starting with 1/2 teaspoon, and blend again to mix it in.
- Serve and Garnish:
Transfer the hummus to a serving dish. Drizzle a bit of extra virgin olive oil on top and sprinkle a pinch of paprika or cayenne pepper for garnish if desired.
Tips:
- Dipping: Serve hummus with fresh veggies like carrots, cucumber slices, bell pepper strips, or pita chips for a healthy snack.
- Spreading: Use hummus as a spread on sandwiches, wraps, or even as a base for avocado toast.
- Storage: Store leftover hummus in an airtight container in the refrigerator for up to 1 week. If the hummus thickens, stir in a little water or olive oil before serving.
- This homemade hummus recipe is a versatile kitchen staple, perfect for quick snacks or as a delicious and nutritious addition to meals!
Oatmeal Mixes
Kitchen Staples: Homemade Oatmeal Mixes for Quick and Healthy Breakfasts
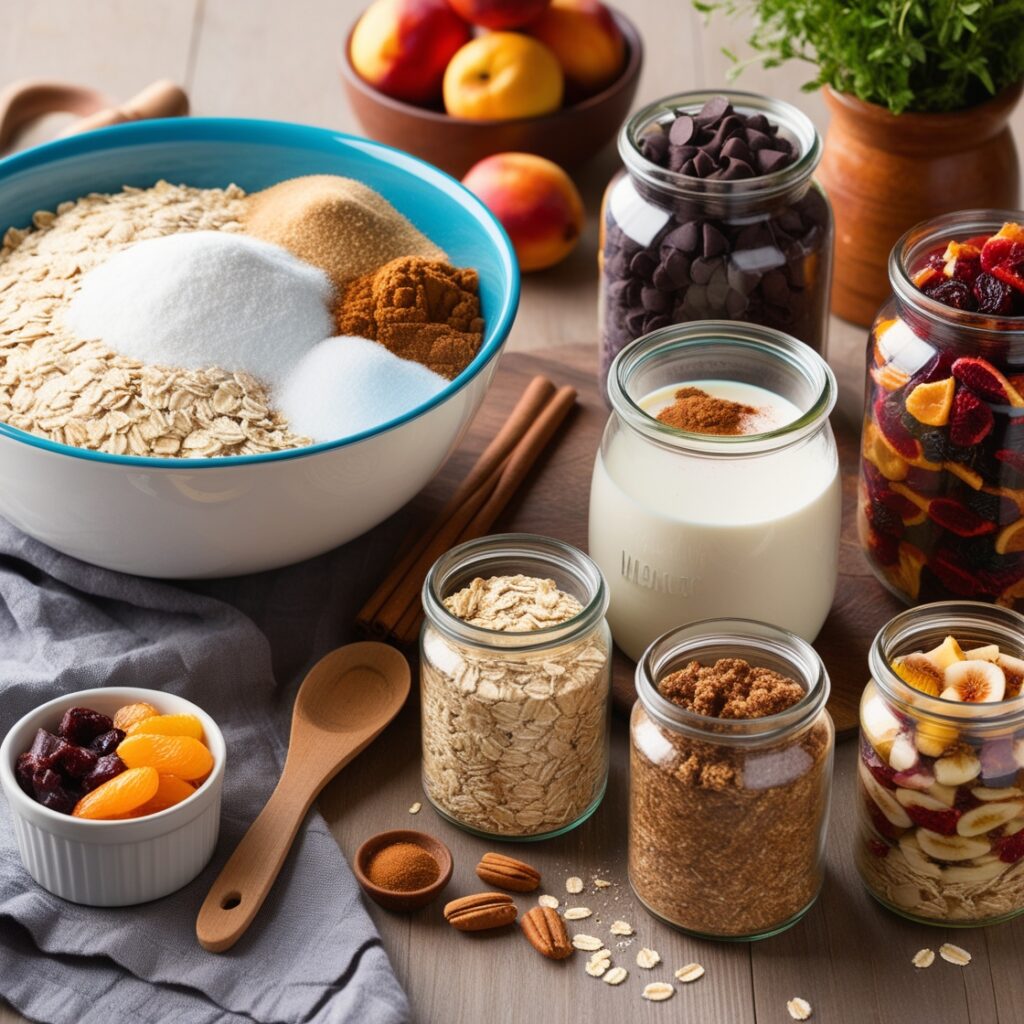
Basic Oatmeal Mix:
2 cups rolled oats
1/2 cup powdered milk (optional)
1/4 cup brown sugar or sweetener of choice (adjust to taste)
1 teaspoon cinnamon (optional)
1/4 teaspoon salt
Flavor Variations (choose any combination):
Fruity Oatmeal Mix:
1/2 cup dried fruit (raisins, cranberries, or chopped apricots)
1/4 cup chopped nuts (walnuts, almonds, or pecans)
Nutty Oatmeal Mix:
1/2 cup chopped nuts (your choice)
1/4 cup chocolate chips (optional)
Spiced Oatmeal Mix:
1 teaspoon vanilla extract (optional)
1/4 teaspoon nutmeg (optional)
Instructions
1. Prepare the Base Mix:
In a large mixing bowl, combine the rolled oats, powdered milk, brown sugar, cinnamon, and salt. Mix well until all ingredients are evenly distributed.
2. Add Flavor Variations:
If making fruity oatmeal, add the dried fruit and nuts to the base mix. Stir until evenly incorporated.
For nutty oatmeal, simply add the chopped nuts and chocolate chips if desired.
For spiced oatmeal, add vanilla extract and nutmeg to the mixture.
3. Store the Mix:
Transfer the oatmeal mix to an airtight container or zip-top bag. Label the container with the date and flavor variations.
Store in a cool, dry place for up to 3 months.
4. Prepare Oatmeal:
To cook, measure out 1/2 cup of the oatmeal mix into a bowl.
Add 1 cup of water or milk (adjust for desired creaminess) and stir.
Microwave on high for 1-2 minutes, or until cooked through. If using the stovetop, combine the mix with water or milk in a saucepan and cook over medium heat for 5-7 minutes, stirring occasionally.
5. Serve:
Top your oatmeal with fresh fruit, a drizzle of honey, or a sprinkle of extra cinnamon if desired. Enjoy your quick and healthy breakfast!
Tips:
- Customize your oatmeal mix with different flavors and toppings based on your preferences.
- Try adding a scoop of nut butter or yogurt for extra protein and creaminess.
Chicken or Vegetable Stock
Kitchen Staples: Homemade stocks for soups and cooking
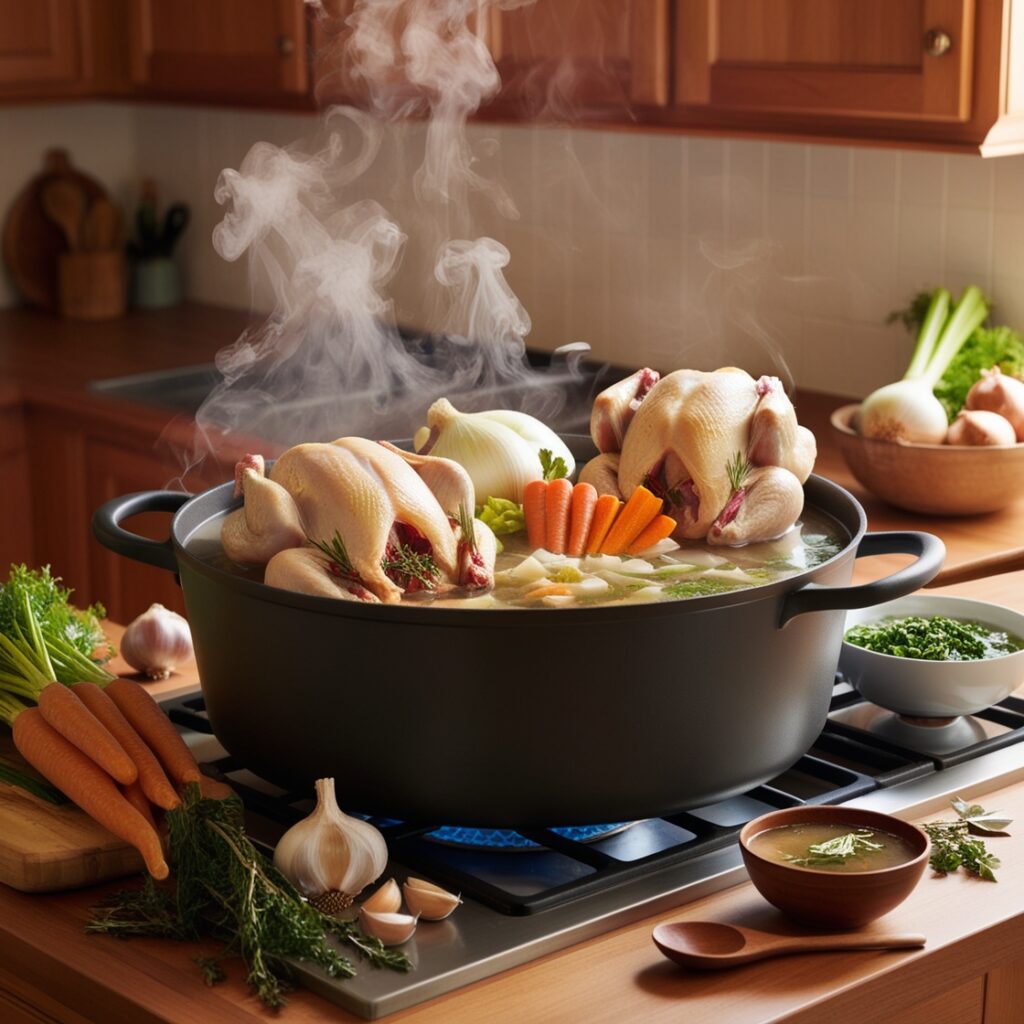
For Chicken Stock:
1 whole chicken (about 3-4 pounds) or 2-3 pounds of chicken bones (wings, carcasses)
2 medium onions, quartered (no need to peel)
2 carrots, chopped into large pieces
2 celery stalks, chopped into large pieces
4-6 cloves garlic, smashed (no need to peel)
2-3 bay leaves
1 teaspoon black peppercorns
Fresh herbs (e.g., thyme, parsley, or dill) – a handful
10-12 cups cold water (enough to cover the ingredients)
For Vegetable Stock:
2 medium onions, quartered (no need to peel)
2 carrots, chopped into large pieces
2 celery stalks, chopped into large pieces
4-6 cloves garlic, smashed (no need to peel)
1-2 bay leaves
1 teaspoon black peppercorns
Fresh herbs (e.g., thyme, parsley, or dill) – a handful
Any leftover vegetable scraps (e.g., mushroom stems, leeks, zucchini)
10-12 cups cold water (enough to cover the ingredients)
Instructions
1. Prepare the Ingredients:
For chicken stock, if using a whole chicken, remove any innards and rinse the chicken under cold water.
For vegetable stock, gather any vegetable scraps you have along with the fresh ingredients.
2. Combine Ingredients:
In a large stockpot, place the chicken (or chicken bones) or vegetables. Add the onions, carrots, celery, garlic, bay leaves, peppercorns, and herbs.
Pour in enough cold water to cover the ingredients by about an inch (approximately 10-12 cups).
3. Bring to a Boil:
Place the pot on the stove over high heat. Bring the mixture to a boil.
4. Simmer:
Once boiling, reduce the heat to low. Allow the stock to simmer gently.
For chicken stock, simmer for about 4-6 hours. For vegetable stock, simmer for about 1-2 hours. Skim off any foam that rises to the surface during the cooking process.
5. Strain the Stock:
After simmering, remove the pot from the heat. Using a fine mesh strainer or cheesecloth, strain the stock into a large bowl or another pot. Discard the solids.
If you want a clearer stock, strain it a second time through a cheesecloth.
6. Cool and Store:
Allow the stock to cool to room temperature. If desired, you can pour the stock into smaller containers for easier storage.
Store in the refrigerator for up to 4-5 days or freeze for up to 3 months. If freezing, leave some space at the top of the container to allow for expansion.
7. Use the Stock:
Use your homemade stock as a base for soups, stews, risottos, and sauces, or simply enjoy it as a warm beverage.
Tips:
- Feel free to customize your stock with other vegetables and herbs you enjoy.
- Using bones that have some meat on them will give you a richer flavor.
- For a more intense flavor, roast the chicken bones or vegetables in the oven before adding them to the pot.
You can find more Pantry Staples Homemade here:
– Pantry Staples: The Essential Guide to DIY Kitchen Essentials
